


Master How to Look Confident in Photos
Published May 3, 2026
You’re probably updating a LinkedIn profile, a resume, a team page, or a portfolio, and you’ve hit the same wall many face. The photo is the problem.
Not because you don’t know how to stand. Usually it’s because the camera makes you self-conscious, your face gets stiff, and every photo feels like a slightly wrong version of you. A lot of “how to look confident in photos” advice makes that worse by telling you to perform confidence instead of helping you create it.
The better approach is simpler. Confidence in photos comes from a mix of internal state, body mechanics, eye expression, and smart setup. And if traditional photoshoots feel stressful, modern AI workflows can make the process much more accessible, especially for people who don’t fit the usual one-size-fits-all posing advice.
Build Confidence From the Inside Out
Most bad photos start before the shutter clicks.
People tense their jaw, lift their shoulders, hold a smile too long, and stare at the lens like they’re taking a test. The result isn’t “unphotogenic.” It’s a stress response. Good photographers know this, which is why strong portraits often come from emotional direction, not just technical direction.
Expert photography guidance notes that genuine confidence in photos starts with internal state, not pose alone. It points to three useful practices: memory recall to trigger real emotion, micro-expression variation so the face doesn’t freeze, and breathing resets between shots to avoid a blank or “zoned-out” look, as explained in this confidence photography guide.
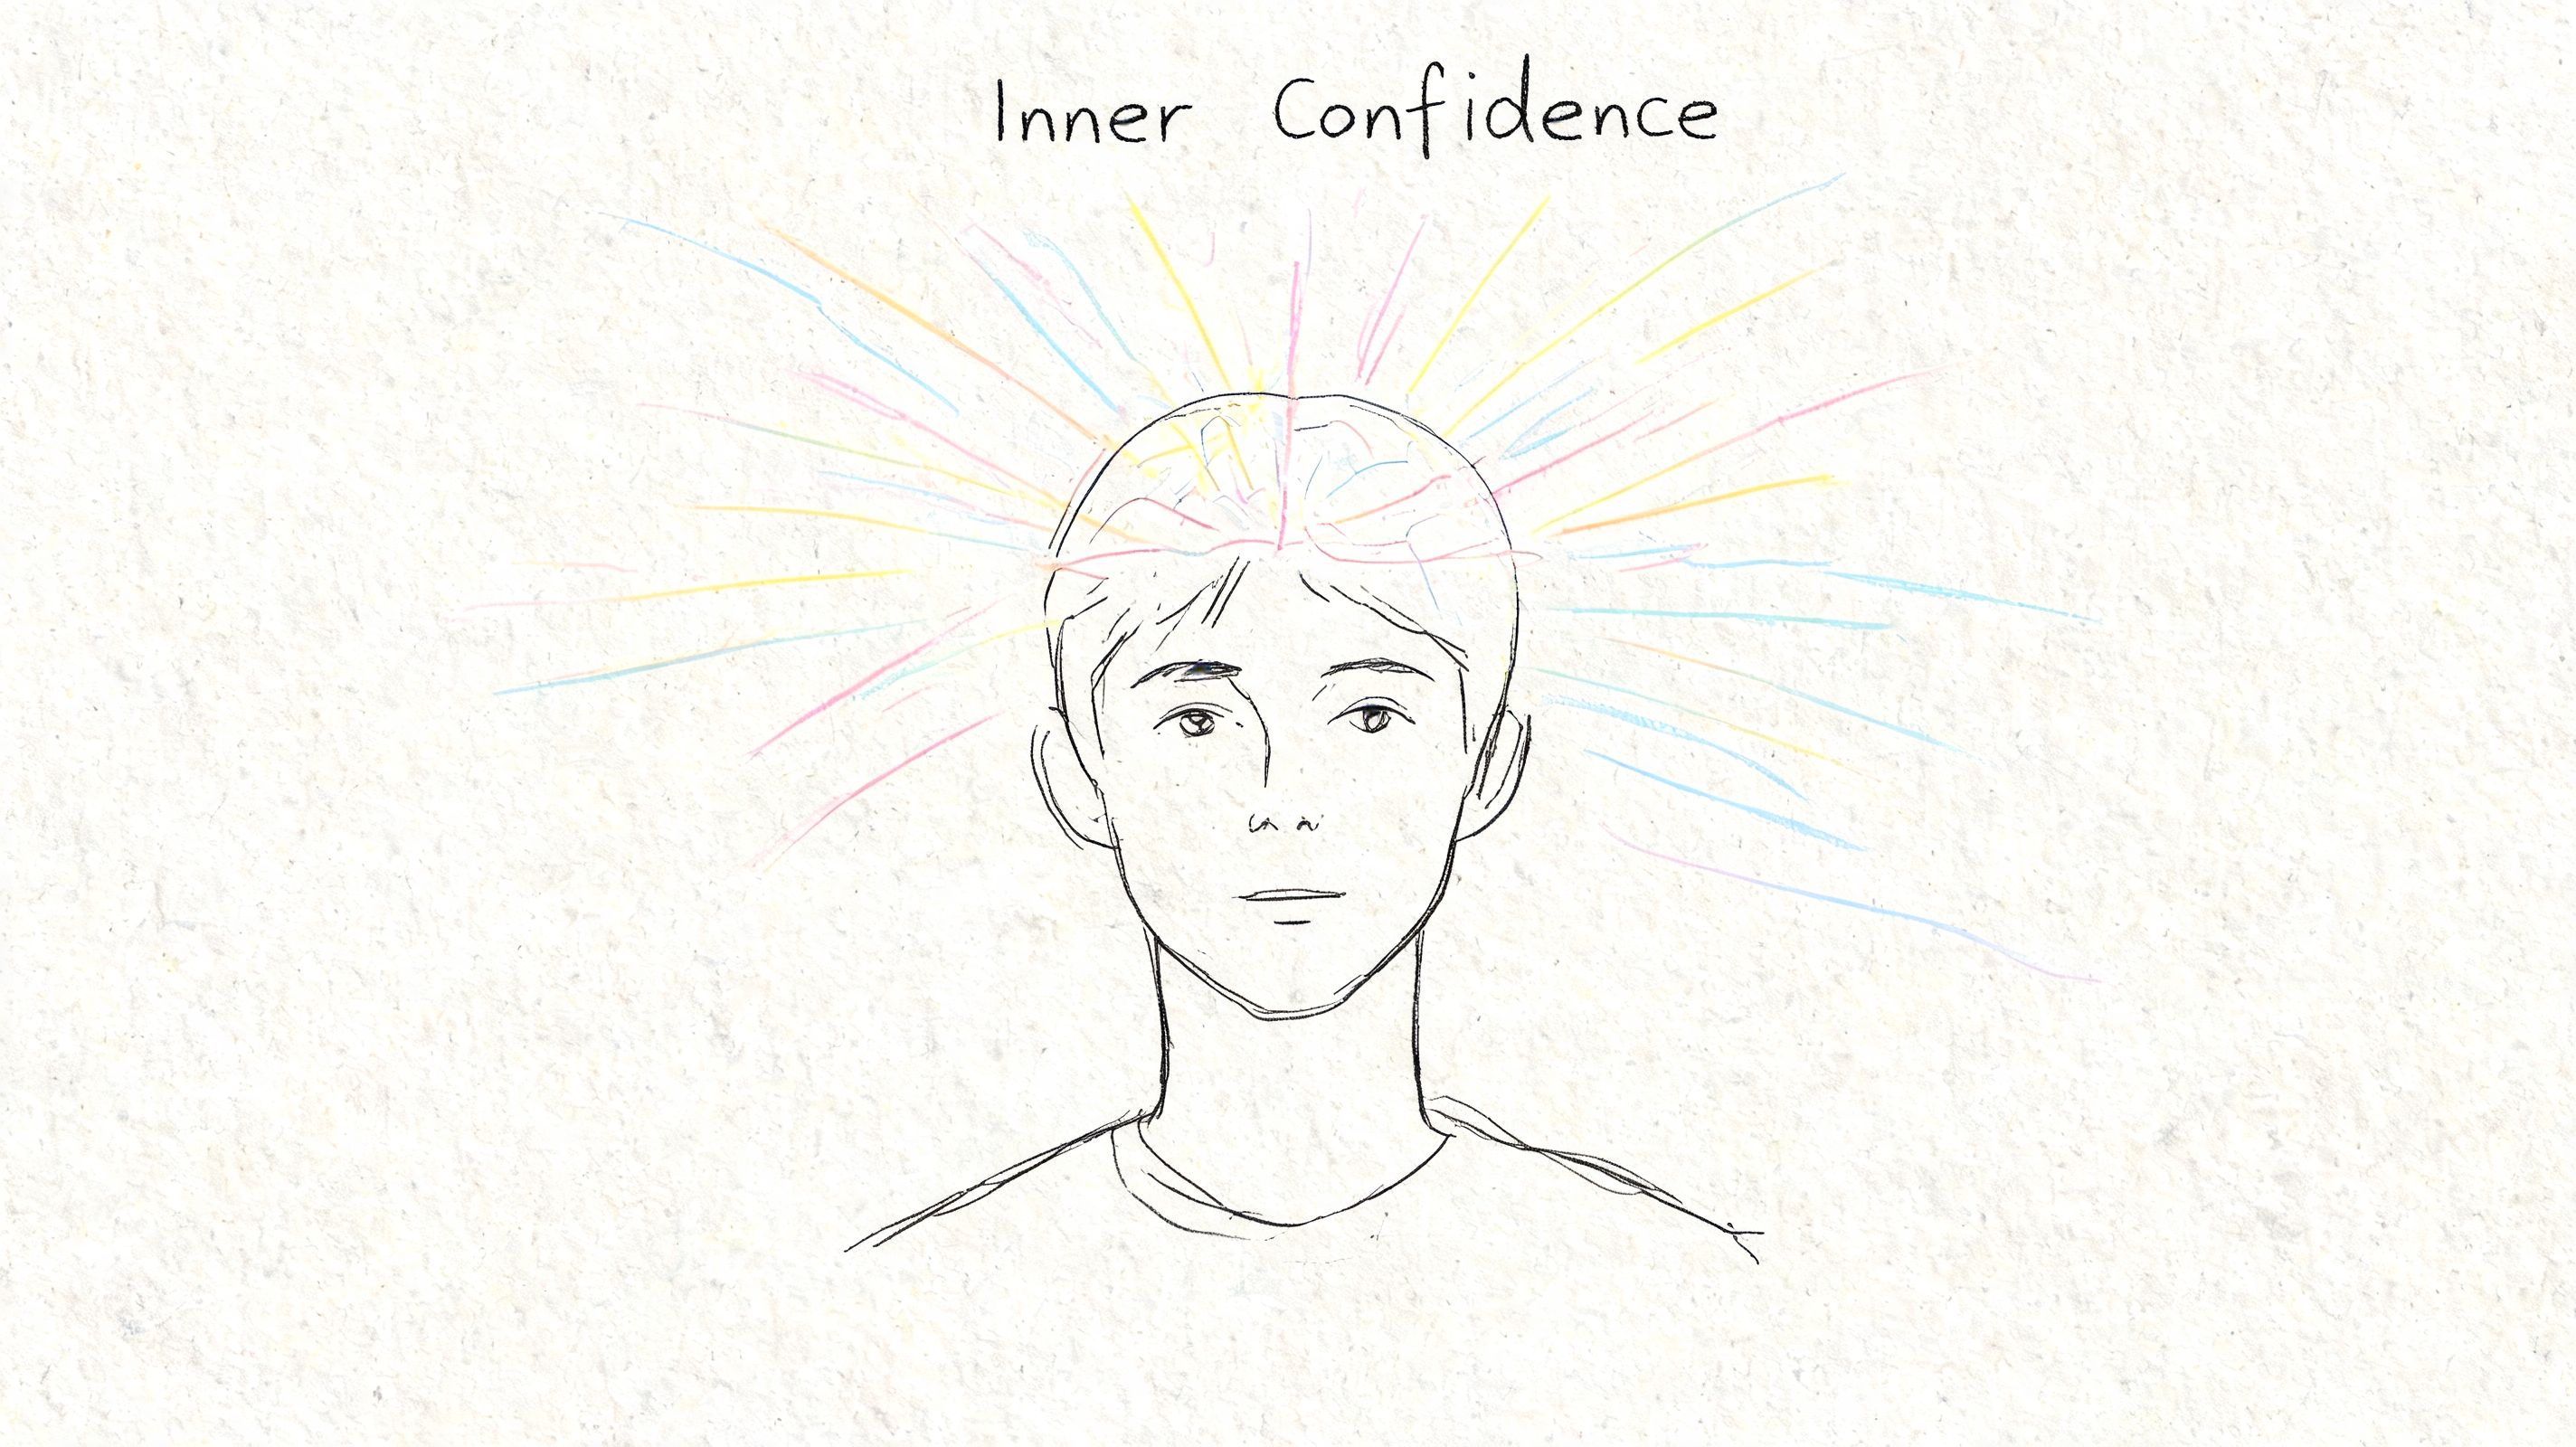
Use memory, not performance
If you tell yourself to “look confident,” your face usually tightens.
A better cue is to think of someone, somewhere, or some moment that changes your expression naturally. That could be a person you trust, a recent win, a place where you felt calm, or a memory that makes you feel grounded. The point isn’t to smile bigger. The point is to let the eyes soften and engage.
A genuine smile starts in the eyes.
That idea matters more than is often acknowledged. Viewers pick up on mismatch fast. If your mouth says “friendly” but your eyes say “tense,” the image feels off even when everything else is technically fine.
Reset between frames
Holding one expression is one of the fastest ways to look uncomfortable. Instead, treat each frame as a fresh start.
Try this simple sequence:
- Exhale fully: Drop the tension in your shoulders and unclench your jaw.
- Look away for a second: This breaks the frozen stare.
- Return with a new expression: Neutral, slight smirk, soft smile, then back to neutral.
- Blink once before the shot: It refreshes the eyes and reduces the strained look.
If camera anxiety is part of the problem, it helps to work on the anxiety itself rather than only the pose. A practical resource on how to overcome social anxiety can help if being photographed makes you hyper-aware or physically tense.
What works and what doesn’t
A quick comparison makes this easier to remember:
| Approach | What it looks like in photos |
|---|---|
| Forcing a smile | Mouth engaged, eyes flat |
| Recalling a real memory | Eyes soften, expression feels coherent |
| Holding one face too long | Stiff, zoned out, awkward |
| Resetting between shots | Natural variation, more usable frames |
Practical rule: Don’t try to act confident for the camera. Create a state that makes confidence visible.
If you get this part right, everything else gets easier. Posture looks more natural. Your eyes stop looking startled. Even small imperfections become less important because the image reads as self-assured.
Master Your Posture for a Confident Silhouette
A confident photo usually doesn’t come from standing “straight.” It comes from standing with shape.
When people face the camera squarely, lock their knees, and pull themselves rigid, they often look broader, stiffer, and less at ease. Professional portrait photographers use a few reliable mechanics to fix that. One of the most useful is turning the body to a 45-degree angle, then leaning slightly forward from the waist. Kelly McPhail’s posing guidance describes this angle as “very slimming and adds a lot of visual interest” and also recommends bringing the ears forward to reduce the appearance of a double chin in photos in this posing tutorial for better photos.
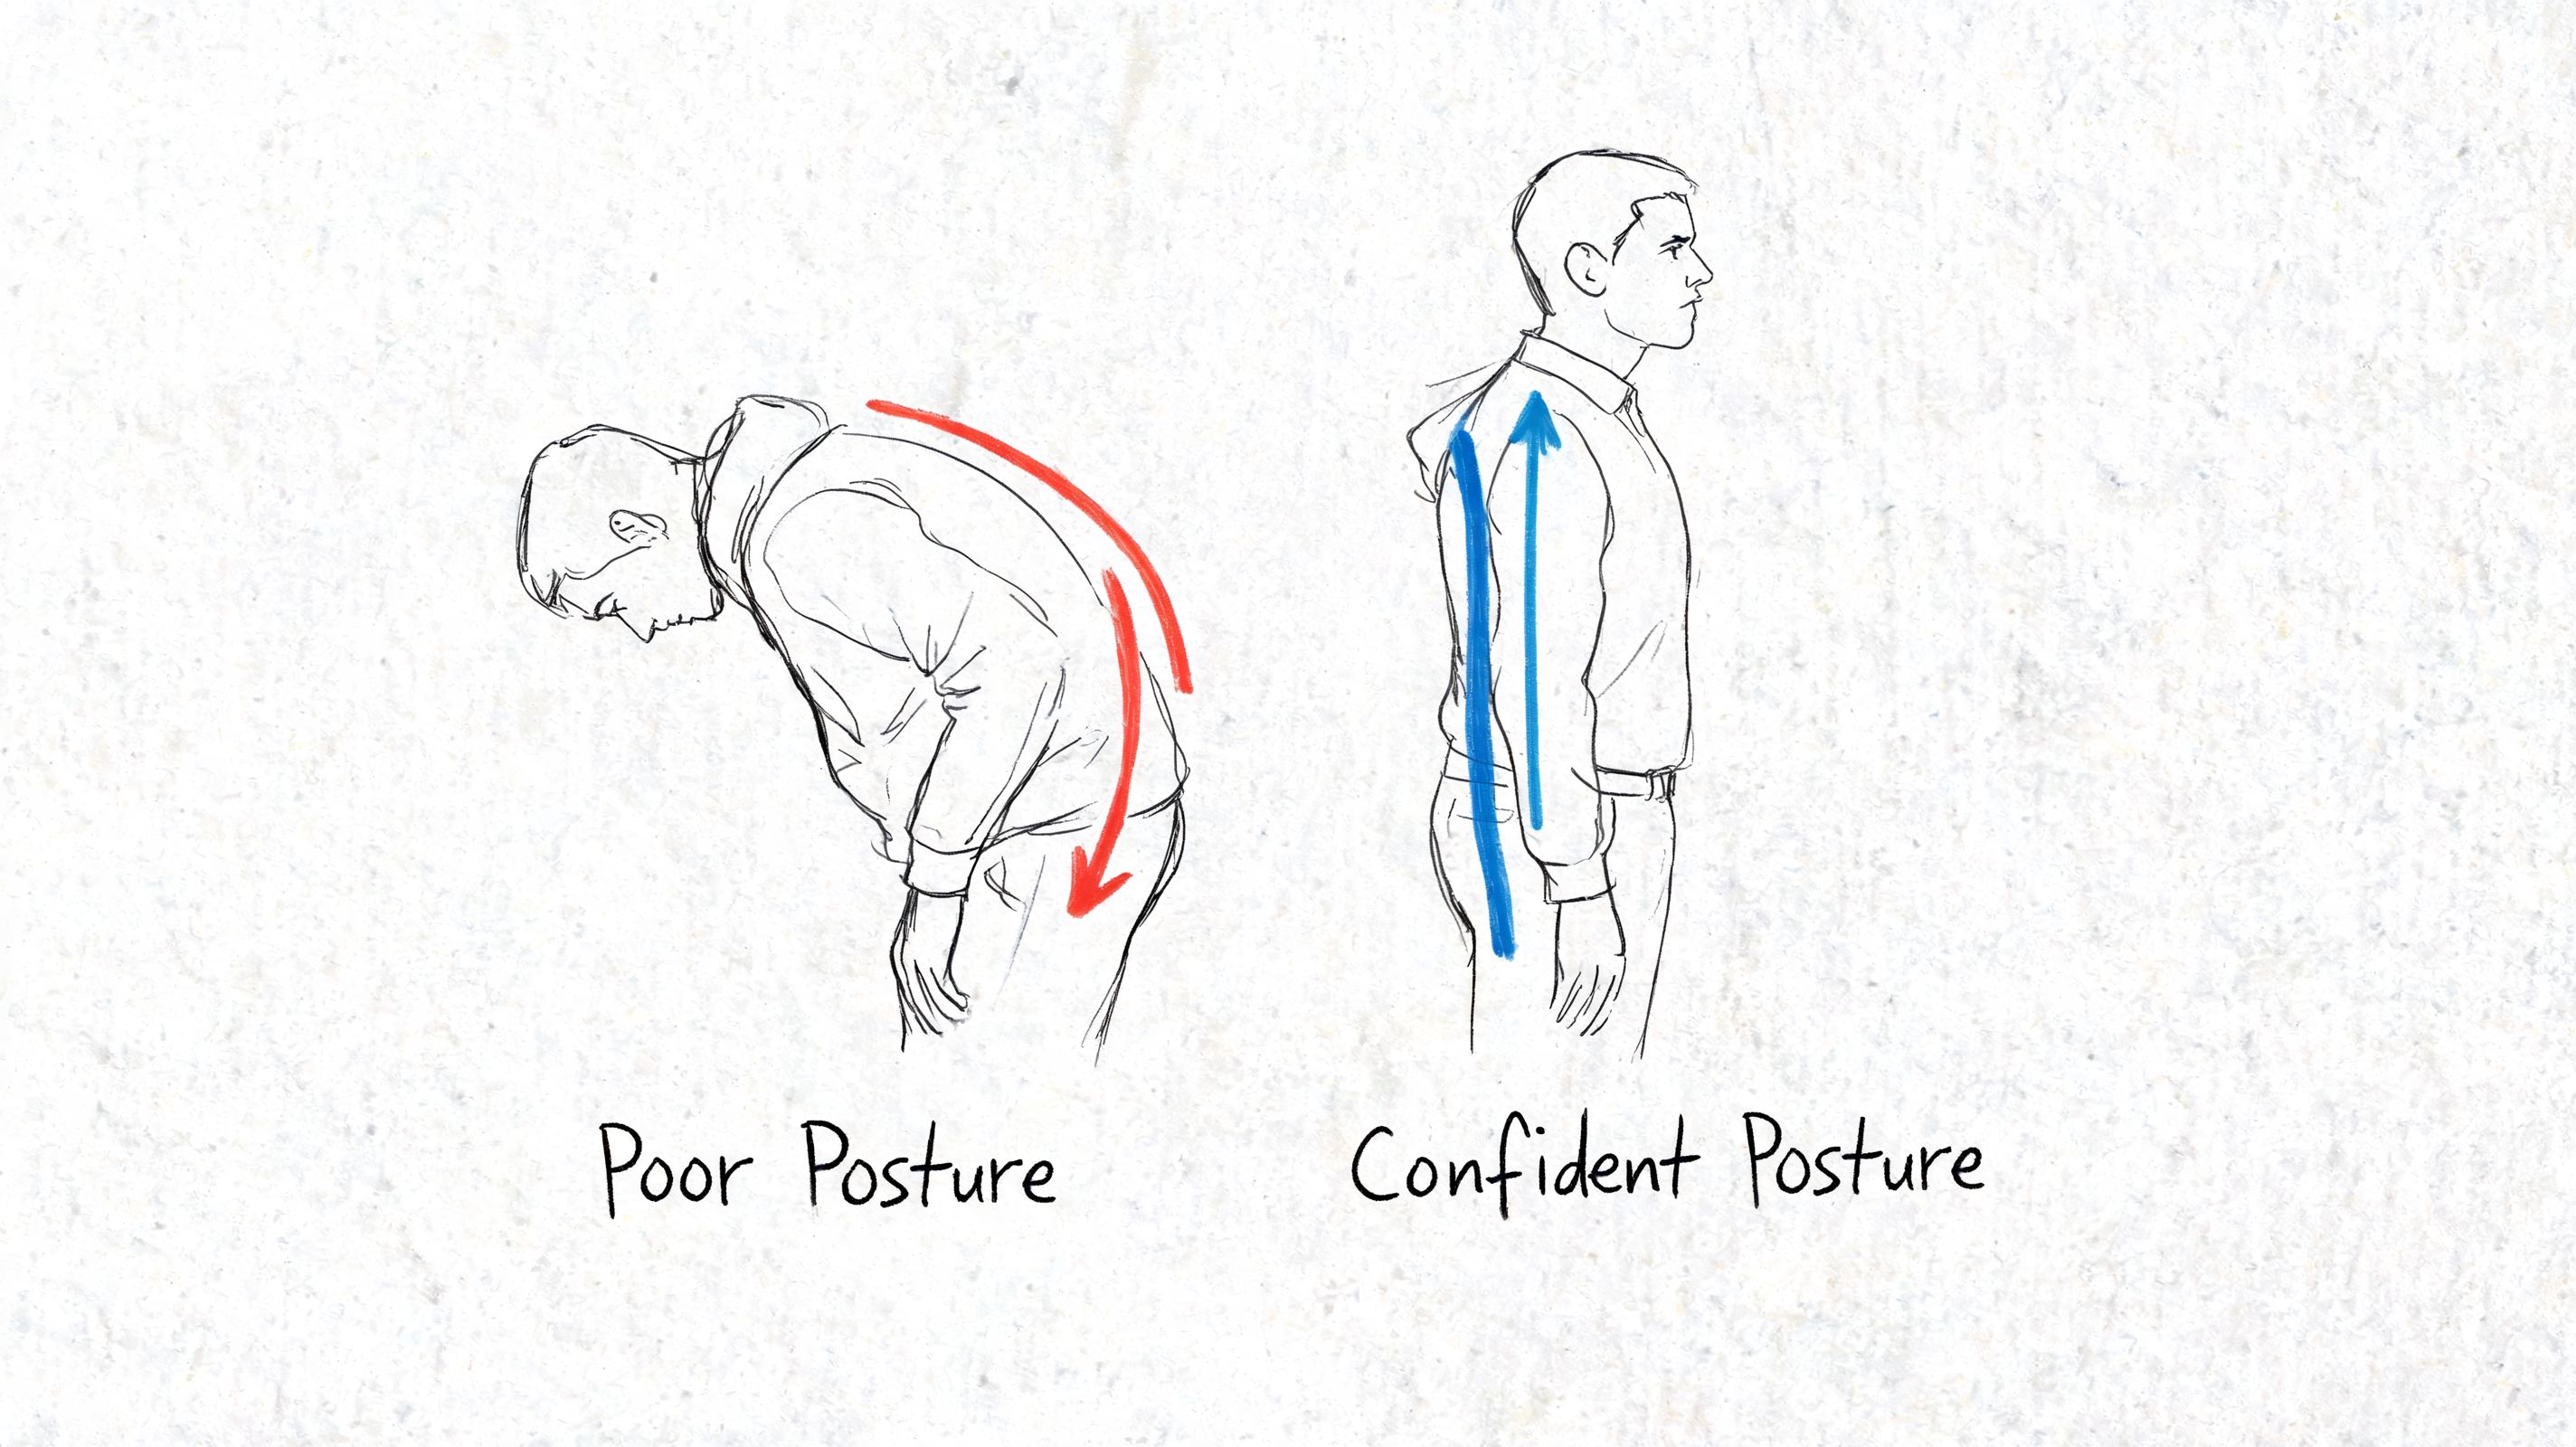
Start with the torso, not the face
It's common to fuss with their smile first. That’s backwards. Fix the body, then the face has something better to sit on.
Use this sequence:
- Turn slightly off-center: Stand at about a 45-degree angle instead of facing the camera head-on.
- Shift your weight: Put more weight on the back leg or whichever stance feels natural. That removes the stiff “passport photo” look.
- Lean from the waist: A small forward lean creates engagement. Don’t bend your neck toward the camera. Move from the torso.
- Relax the shoulders: Lower them. Tension in the shoulders reads as nervousness fast.
The change is subtle, but the effect is strong. The body gains dimension, the waistline looks cleaner, and the image feels more intentional.
Fix the jawline with one small move
The most useful headshot trick is not “chin up.” It’s “ears forward.”
People often pull their chin back when they feel watched. Cameras exaggerate that. The jaw softens, the neck compresses, and the lower face loses definition. Pushing the ears slightly forward, while keeping the chest open, helps define the jawline without looking exaggerated.
A simple cue works well: think “forehead slightly toward the camera, crown tall.”
Don’t jam your chin down. Extend gently forward, then settle into a natural gaze.
That’s also why camera height matters. A lens at or slightly above eye level usually gives you a cleaner result than a low camera angle.
The common mistakes
Here, “trying hard” usually shows up.
| Mistake | Better move |
|---|---|
| Facing the camera square-on | Angle the body slightly |
| Standing rigidly upright | Add a slight forward lean |
| Chin tucked back | Bring ears forward |
| Raised shoulders | Exhale and drop them |
Micro-adjustments matter more than dramatic posing. If you move an inch, shift your weight, reset your shoulders, or rotate the torso slightly, the photo often improves immediately.
If you want a deeper breakdown of body positioning for professional portraits, this guide on how to pose for a professional headshot is a useful companion.
What confidence looks like physically
Confident posture isn’t large. It’s clear.
Your frame should look open, balanced, and deliberate. That means length through the spine, space around the neck, and a body angle that creates structure without stiffness. You’re not trying to look dominant. You’re trying to look comfortable occupying space.
That distinction matters in professional photos. The best headshots don’t scream. They signal control.
Unlock a Confident Gaze with the Squinch
If your posture is solid but the photo still looks uncertain, the problem is usually in the eyes.
A lot of people open their eyes too wide when a camera appears. It’s a reflex. Unfortunately, it can read as startled, fearful, or overly eager. One of the most useful fixes is the squinch, a slight narrowing of the eyes that creates a more relaxed, assured gaze.
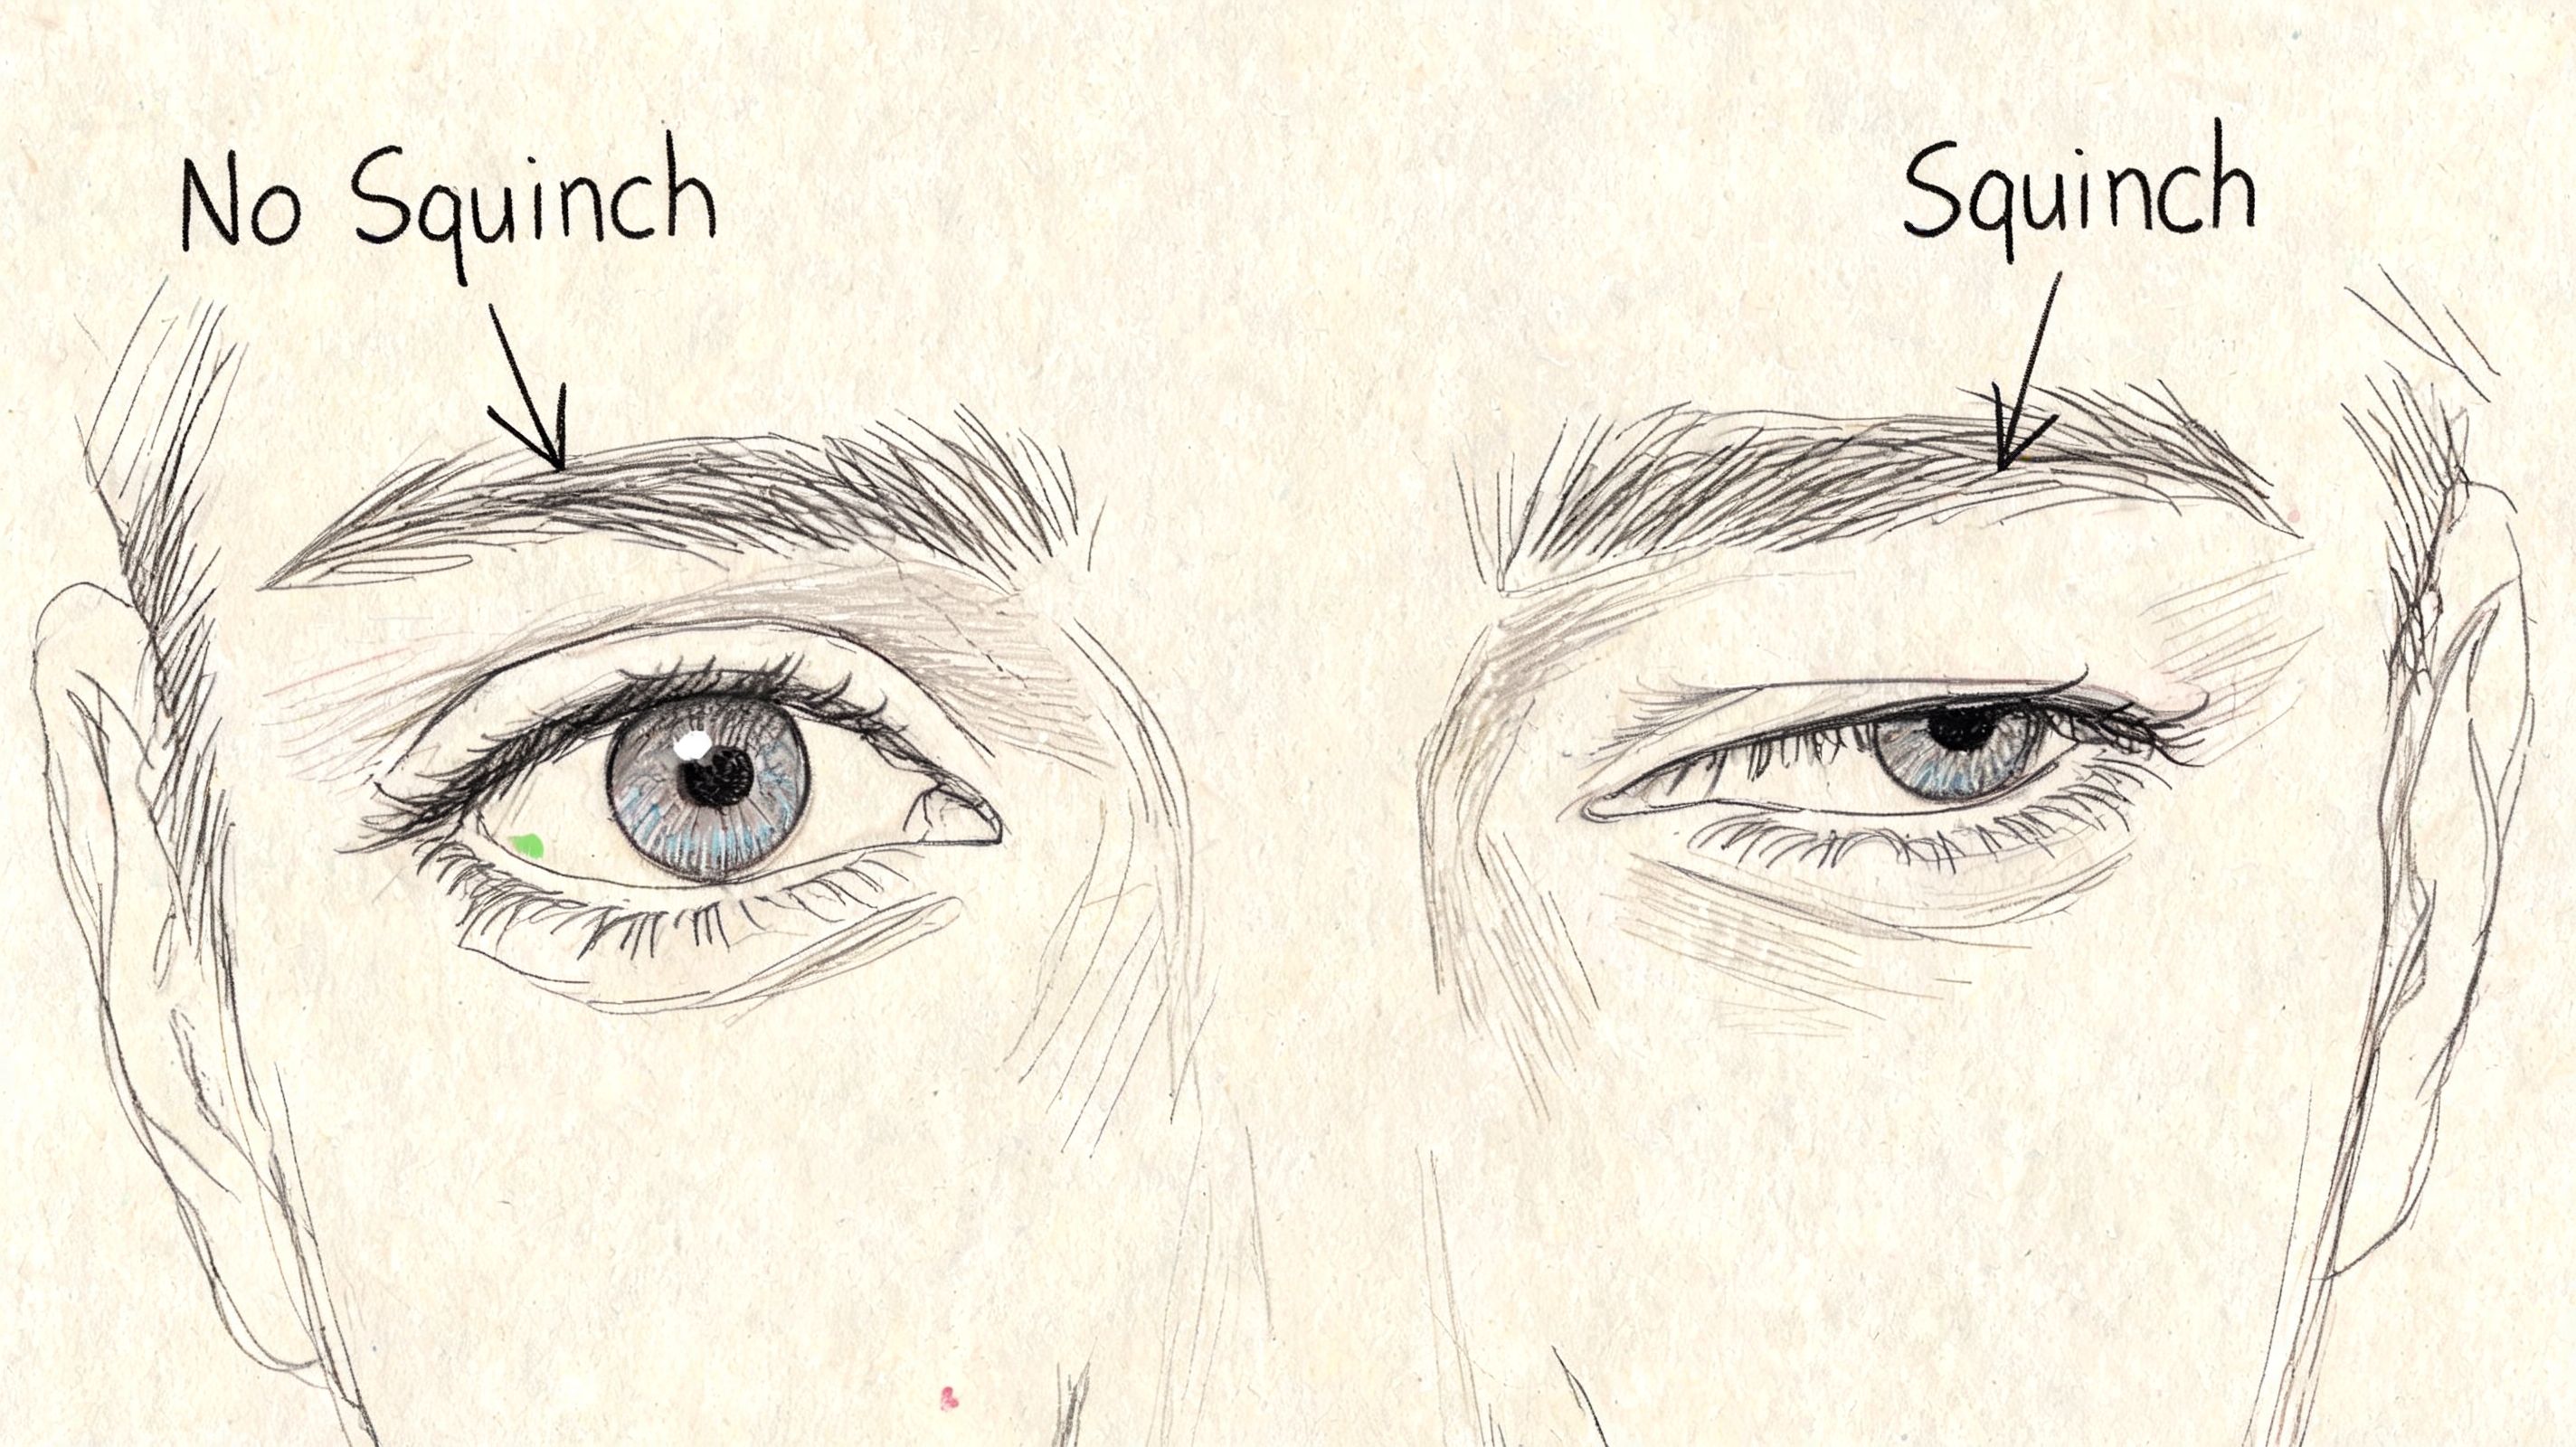
Research summarized by Buffer from PhotoFeeler found that photos using a subtle squinch improved perceptions of competence, likability, and influence, with competence rising by up to 20-30% compared with wide-open eyes in their breakdown of profile picture psychology.
What a squinch actually is
This isn’t a hard squint.
A good squinch means lowering the lower eyelids slightly so the eyes look focused and calm. The upper lids stay relatively relaxed. Think “soft intensity,” not “sun in my face.”
If you overdo it, you’ll look skeptical or annoyed. If you do too little, your eyes may still read as surprised.
Try this in a mirror:
- Look straight ahead: Start with your normal neutral expression.
- Lower the lower lids slightly: Aim for a small change, not a dramatic squeeze.
- Keep the brow soft: Don’t furrow.
- Add a gentle mouth expression: Neutral, small smile, or relaxed closed-mouth smile all work.
The face should feel settled, not strained.
Why it changes the whole photo
The eyes are where confidence becomes visible.
A wide-eyed look often communicates uncertainty because it resembles surprise. A slight squinch suggests comfort, control, and presence. That’s why someone can have a perfect smile and still look uneasy if their eyes are too open.
This demonstration helps if you want to see the movement in action:
The best version is usually subtle enough that other people notice the effect, not the technique.
Practice without getting weird about it
Don’t rehearse the squinch for half an hour. That usually creates tension.
Instead, test a few frames on your phone with three versions of your gaze:
- Normal neutral eyes
- Slight squinch
- Too much squinch
Then compare them. It's usually evident that the middle version looks strongest. It reads as composed without looking theatrical.
If you only remember one facial technique from this article, remember this one. A confident mouth helps. A confident gaze carries the image.
Use Light and Angles Like a Pro with Any Camera
You don’t need a DSLR, studio flash, or a photographer to get a strong base image. You need decent light and a sensible camera position.
The simplest rule is this. Put your face toward the biggest soft light source available. In most homes or offices, that’s a window. If the light is behind you, your face loses detail and the camera struggles. If the light is directly overhead, it can create shadows that make you look tired or tense.
The easiest lighting setup
Stand or sit facing a window. If the light feels too harsh, move a little farther back so it becomes softer across your face.
Use these cues:
- Face the light source: Don’t turn your back to it.
- Keep the light slightly off-center if needed: A small turn can add dimension.
- Avoid mixed light when possible: Window light plus a harsh ceiling bulb often looks messy.
- Check the eyes: If there’s a soft catchlight, the setup is usually working.
Good light does a lot of heavy lifting. Skin looks smoother, the eyes look brighter, and your expression reads more clearly.
Camera height matters more than filters
A low camera angle is rarely flattering for a professional image. It can distort the jawline and make posture harder to control.
Set the camera at or slightly above eye level. That works whether you’re using a phone, webcam, or laptop. Prop the device on books if you need to. Then step back enough that the camera isn’t inches from your face.
Here’s a quick setup guide:
| Element | Best default |
|---|---|
| Light | Window in front of you |
| Camera height | Eye level or slightly above |
| Distance | Far enough to avoid distortion |
| Background | Clean and not distracting |
If you’re building your own source photos from scratch, this practical guide on how to take professional pictures walks through the setup well.
What works versus what wastes time
A lot of people spend too long tweaking apps and too little time fixing the room. That’s backwards.
Move the light first. Raise the camera second. Clean the background third. Most of the visual quality comes from those decisions, not from editing afterward.
Turn Your Confident Selfies into Professional Headshots with FaceJam
Traditional headshot advice assumes you can relax on command, make perfect eye contact, and express confidence in a very specific corporate style. That works for some people. It doesn’t work for everyone.
For many professionals, the hardest part isn’t technical. It’s the pressure. Neurodivergent professionals, career changers, and people from cultures where reserved expression feels more natural often get pushed toward a narrow version of “confident.” The result is a photo that may look polished but doesn’t feel like them.
That gap matters. The verified data for this article notes that mainstream advice often reflects Anglo-American norms, and that a 2025 LinkedIn Workplace Report found 41% of neurodivergent professionals report camera anxiety as a barrier to profile updates. It also notes that many global professionals experience confidence through more reserved expressions, even though Western-centric advice often tells them to smile bigger.
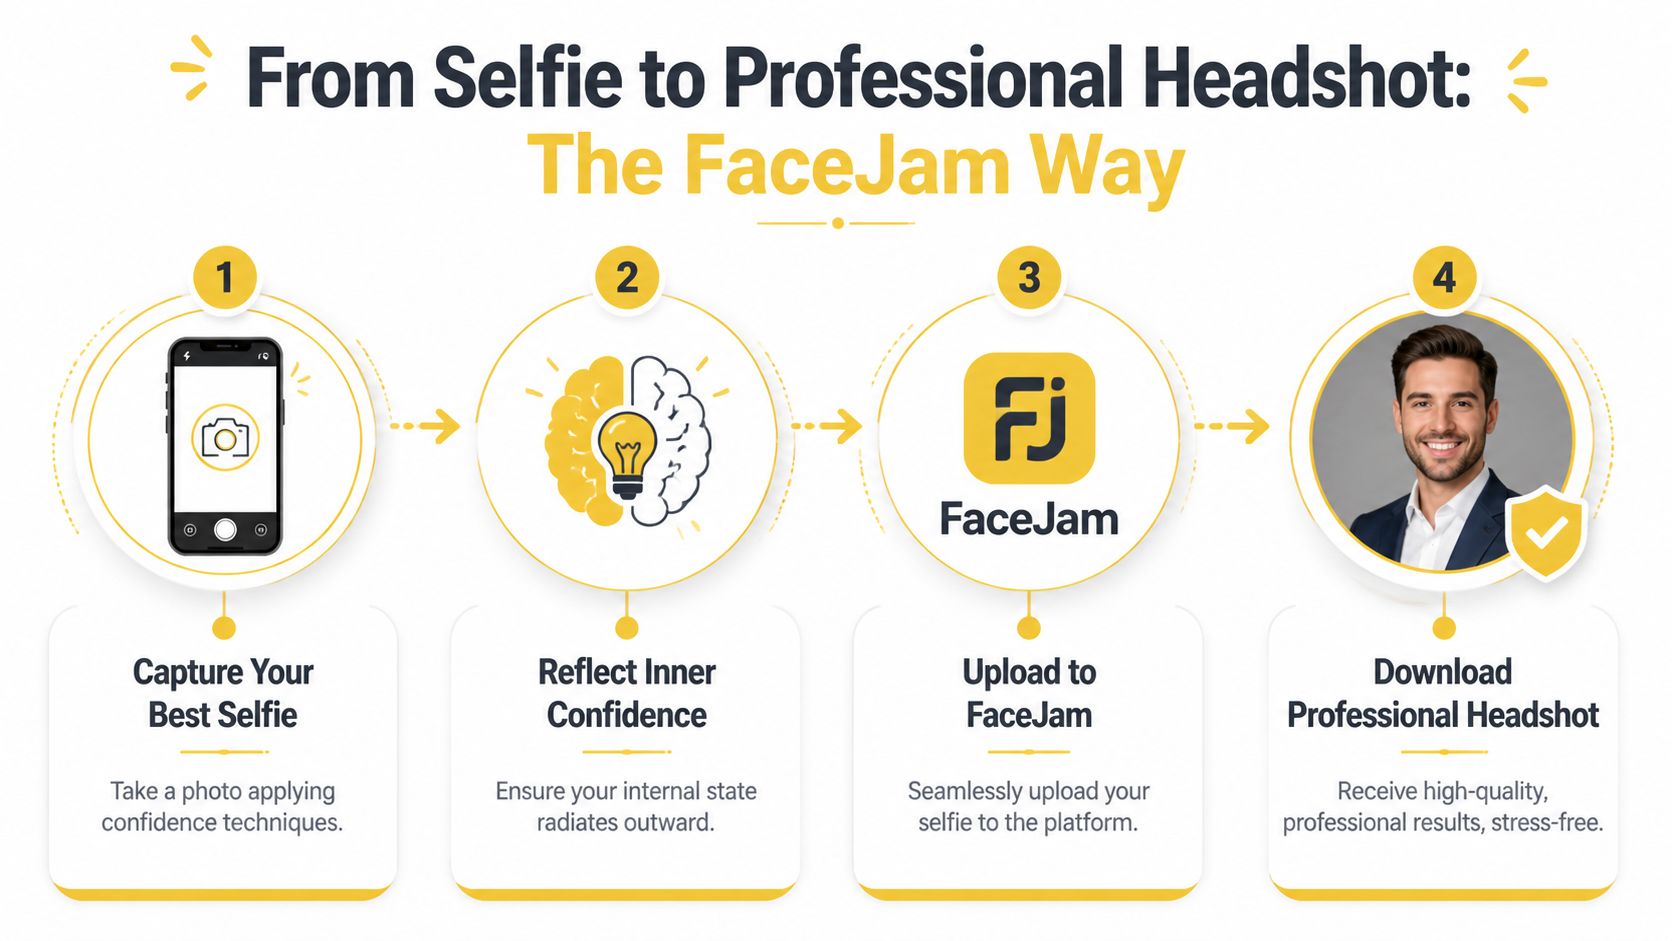
Why AI changes the process
AI headshots can remove the worst part of professional photography for a lot of people. You don’t need to perform under time pressure in front of a stranger. You can take source selfies in a familiar space, when you’re regulated, rested, and able to try multiple expressions without feeling watched.
That changes the emotional quality of the image pool. Instead of hoping one paid session catches your best moment, you start with comfortable source photos and generate a broad range of polished outcomes. Then you choose the result that feels most accurate.
This is one reason AI workflows can be more inclusive than standard shoot-day advice. They let the user define what confidence looks like.
How to prepare selfies that generate stronger headshots
AI isn’t magic. It still depends on the quality of the input. The better your source selfies, the more natural your results tend to feel.
Use this approach:
- Keep the expression real: Don’t force a broad smile just because you think you’re supposed to.
- Use the posture cues from earlier: Body angle, open shoulders, and a defined jawline still matter.
- Work in good light: A clean, well-lit selfie gives the system more useful facial detail.
- Take several variations: Neutral, soft smile, and slightly more direct gaze are all worth capturing.
- Wear something aligned with your industry: Not costume. Context.
Some of the best source images aren’t the most polished selfies. They’re the ones where your face looks most settled and believable.
Why this matters for job seekers
A professional image is only one piece of your career story, but it does sit next to your name on platforms where first impressions happen quickly. If you’re also updating the written side of that story, a tool that helps you build your resume with AI can pair well with a fresh headshot so your profile and resume evolve together.
For people changing industries, re-entering the workforce, or rebuilding personal branding after a long gap, that combination matters. You want the photo and the positioning to feel consistent.
A better standard for confidence
The old standard was “look more polished.” The better standard is “look credible and like yourself.”
That’s especially important if standard eye contact advice, smiling advice, or posing advice has always felt unnatural to you. Reserved can still look confident. Calm can still look authoritative. Direct doesn’t always have to mean expansive.
If you want to try an AI workflow built for this use case, FaceJam lets you turn everyday selfies into professional-grade headshots without the friction of booking a traditional shoot.
The Final Cut A Checklist for Choosing Your Best Shot
Choosing the right image is its own skill. Many individuals pick the photo where they think they look most attractive, then wonder why it doesn’t feel right professionally.
A stronger test is to look for confidence signals. The best shot usually isn’t the one with the biggest smile or the most dramatic angle. It’s the one where posture, expression, light, and authenticity all line up.
The confidence checklist
Review your options against these questions:
Does the posture look open and intentional?
Look for length in the spine, relaxed shoulders, and a body position that doesn’t feel rigid.Is the jawline defined without strain?
If the chin is pulled back or the neck looks compressed, skip it.Do the eyes look calm and engaged?
You want focus, not wide-eyed tension.Does the expression feel believable?
If the smile looks pasted on, people will feel that mismatch even if they can’t explain it.Is the lighting helping your face?
Good light should make your features readable, not flatten or obscure them.Would this image make sense beside your current professional identity?
A startup founder, therapist, attorney, actor, and real estate agent can all look confident differently.
Compare photos like an editor, not a subject
Many individuals misstep, judging based on tiny personal insecurities no one else notices.
Use a simpler lens:
| Ask this | Not this |
|---|---|
| Do I look credible and comfortable? | Do I look flawless? |
| Would I trust this person professionally? | Is every feature perfect? |
| Does this look like me on a good day? | Can I find one tiny thing to criticize? |
Choose the photo that communicates steadiness. That usually beats the one trying hardest to impress.
Make the final decision easier
If two images are close, pick the one with less visible effort.
Less forced smile. Less dramatic pose. Less tension around the eyes. Professional confidence tends to read best when it looks natural, not manufactured.
And if you’re unsure, step away for a few hours before deciding. Distance helps you judge the image by impact instead of self-consciousness.
A strong professional photo shouldn’t require perfect posing instincts or an expensive shoot. If you want a faster, lower-pressure way to create polished headshots from selfies, FaceJam makes it easy to generate professional images that fit LinkedIn, resumes, applications, and team profiles.


