


Create Your Own Profile Picture: AI Guide 2026
Published May 5, 2026
You polish your resume, tighten your LinkedIn headline, and rewrite your bio. Then the photo undercuts all of it. It is a crop from a wedding, a blurry conference badge scan, or a car selfie with hard shadows across your face.
That gap is usually the primary problem. The goal is not just to create your own profile picture. The goal is to create one that survives first impressions, looks like you on a good day, and crops cleanly across the platforms where people view it.
AI can help, but it does not rescue weak input. In practice, the keeper rate rises or falls based on decisions made before you upload anything: the lighting in the selfie, the camera height, the expression, the consistency between shots, and whether the framing gives the model enough useful information about your face. Good source photos give the AI a clear pattern to work from. Bad ones often produce the familiar weirdness, glossy skin, drifting eye lines, mismatched teeth, or a face that feels close to yours but not quite right.
That is why this process needs two skills at once. Part photography, part prompt discipline. If you handle both, you can get a polished headshot without booking a studio, then finish it properly for LinkedIn, company directories, speaking bios, and social profiles. And if you are already refreshing the rest of your presence, pair the image update with solid LinkedIn profile optimization tips.
Why a Great Profile Picture Is Your Unfair Advantage
You update your headline, tighten your bio, and finally make your profile say the right things. Then someone lands on the page and sees a dim crop from three years ago. The photo wins that first argument, whether you meant it to or not.
A strong profile picture changes how the rest of your profile is read. It signals that you are current, credible, and easy to place in a real conversation. A weak one creates drag before anyone reaches your experience section. People hesitate for small reasons. Harsh car lighting, a party background, heavy smoothing, or a photo that no longer looks like you can all make the profile feel less trustworthy.
Earlier in the article, I mentioned the visibility upside of using a profile photo at all. The more practical point here is what a good one does beyond visibility. It sets expectation. It tells recruiters, clients, and collaborators, "Yes, this is the person you will meet on Zoom, at the interview, or in the room."
Practical rule: If your current photo doesn’t look like the person who would show up to the meeting, replace it.
That standard helps more than people expect. In AI headshot projects, the highest keeper rates usually come from aiming for believable, not impressive. The image needs to look like your best normal day, not a different person with better skin and a borrowed jawline. If the result feels a little too polished, viewers notice. If it feels accurate and well-lit, they move on to what you wrote.
A good image also makes the rest of your profile work harder. If you’re already revising your headline, experience section, and featured content, pair that work with solid LinkedIn profile optimization tips so your photo and profile tell the same story.
What AI changes and what it doesn’t
AI shortens the production process. You can skip the studio booking, create several looks quickly, and test different crops for different platforms. It also introduces a new requirement. You need to give the model inputs it can read cleanly.
That is the part many first-time users miss. AI headshot tools are pattern builders. They study your source selfies, infer what your face should look like across angles and expressions, then generate a polished version from that pattern. If your inputs are inconsistent, the output often gets strange in predictable ways. Eyes drift. Teeth change shape. Skin turns waxy. Hairlines become too neat. The result is close enough to be tempting and off enough to kill trust.
I usually tell people to treat this like two jobs: capture good source material, then direct the generation. If you want a cleaner starting point, these tips on how to make iPhone pictures look professional will improve your inputs before you upload anything.
That trade-off is the unfair advantage. People who understand both sides of the process get profile pictures that look natural, crop well, and hold up across LinkedIn, company directories, speaking bios, and social platforms. People who rely on AI to fix weak selfies usually spend more time regenerating and still end up with fewer keepers.
Preparing Your Selfies for AI Success
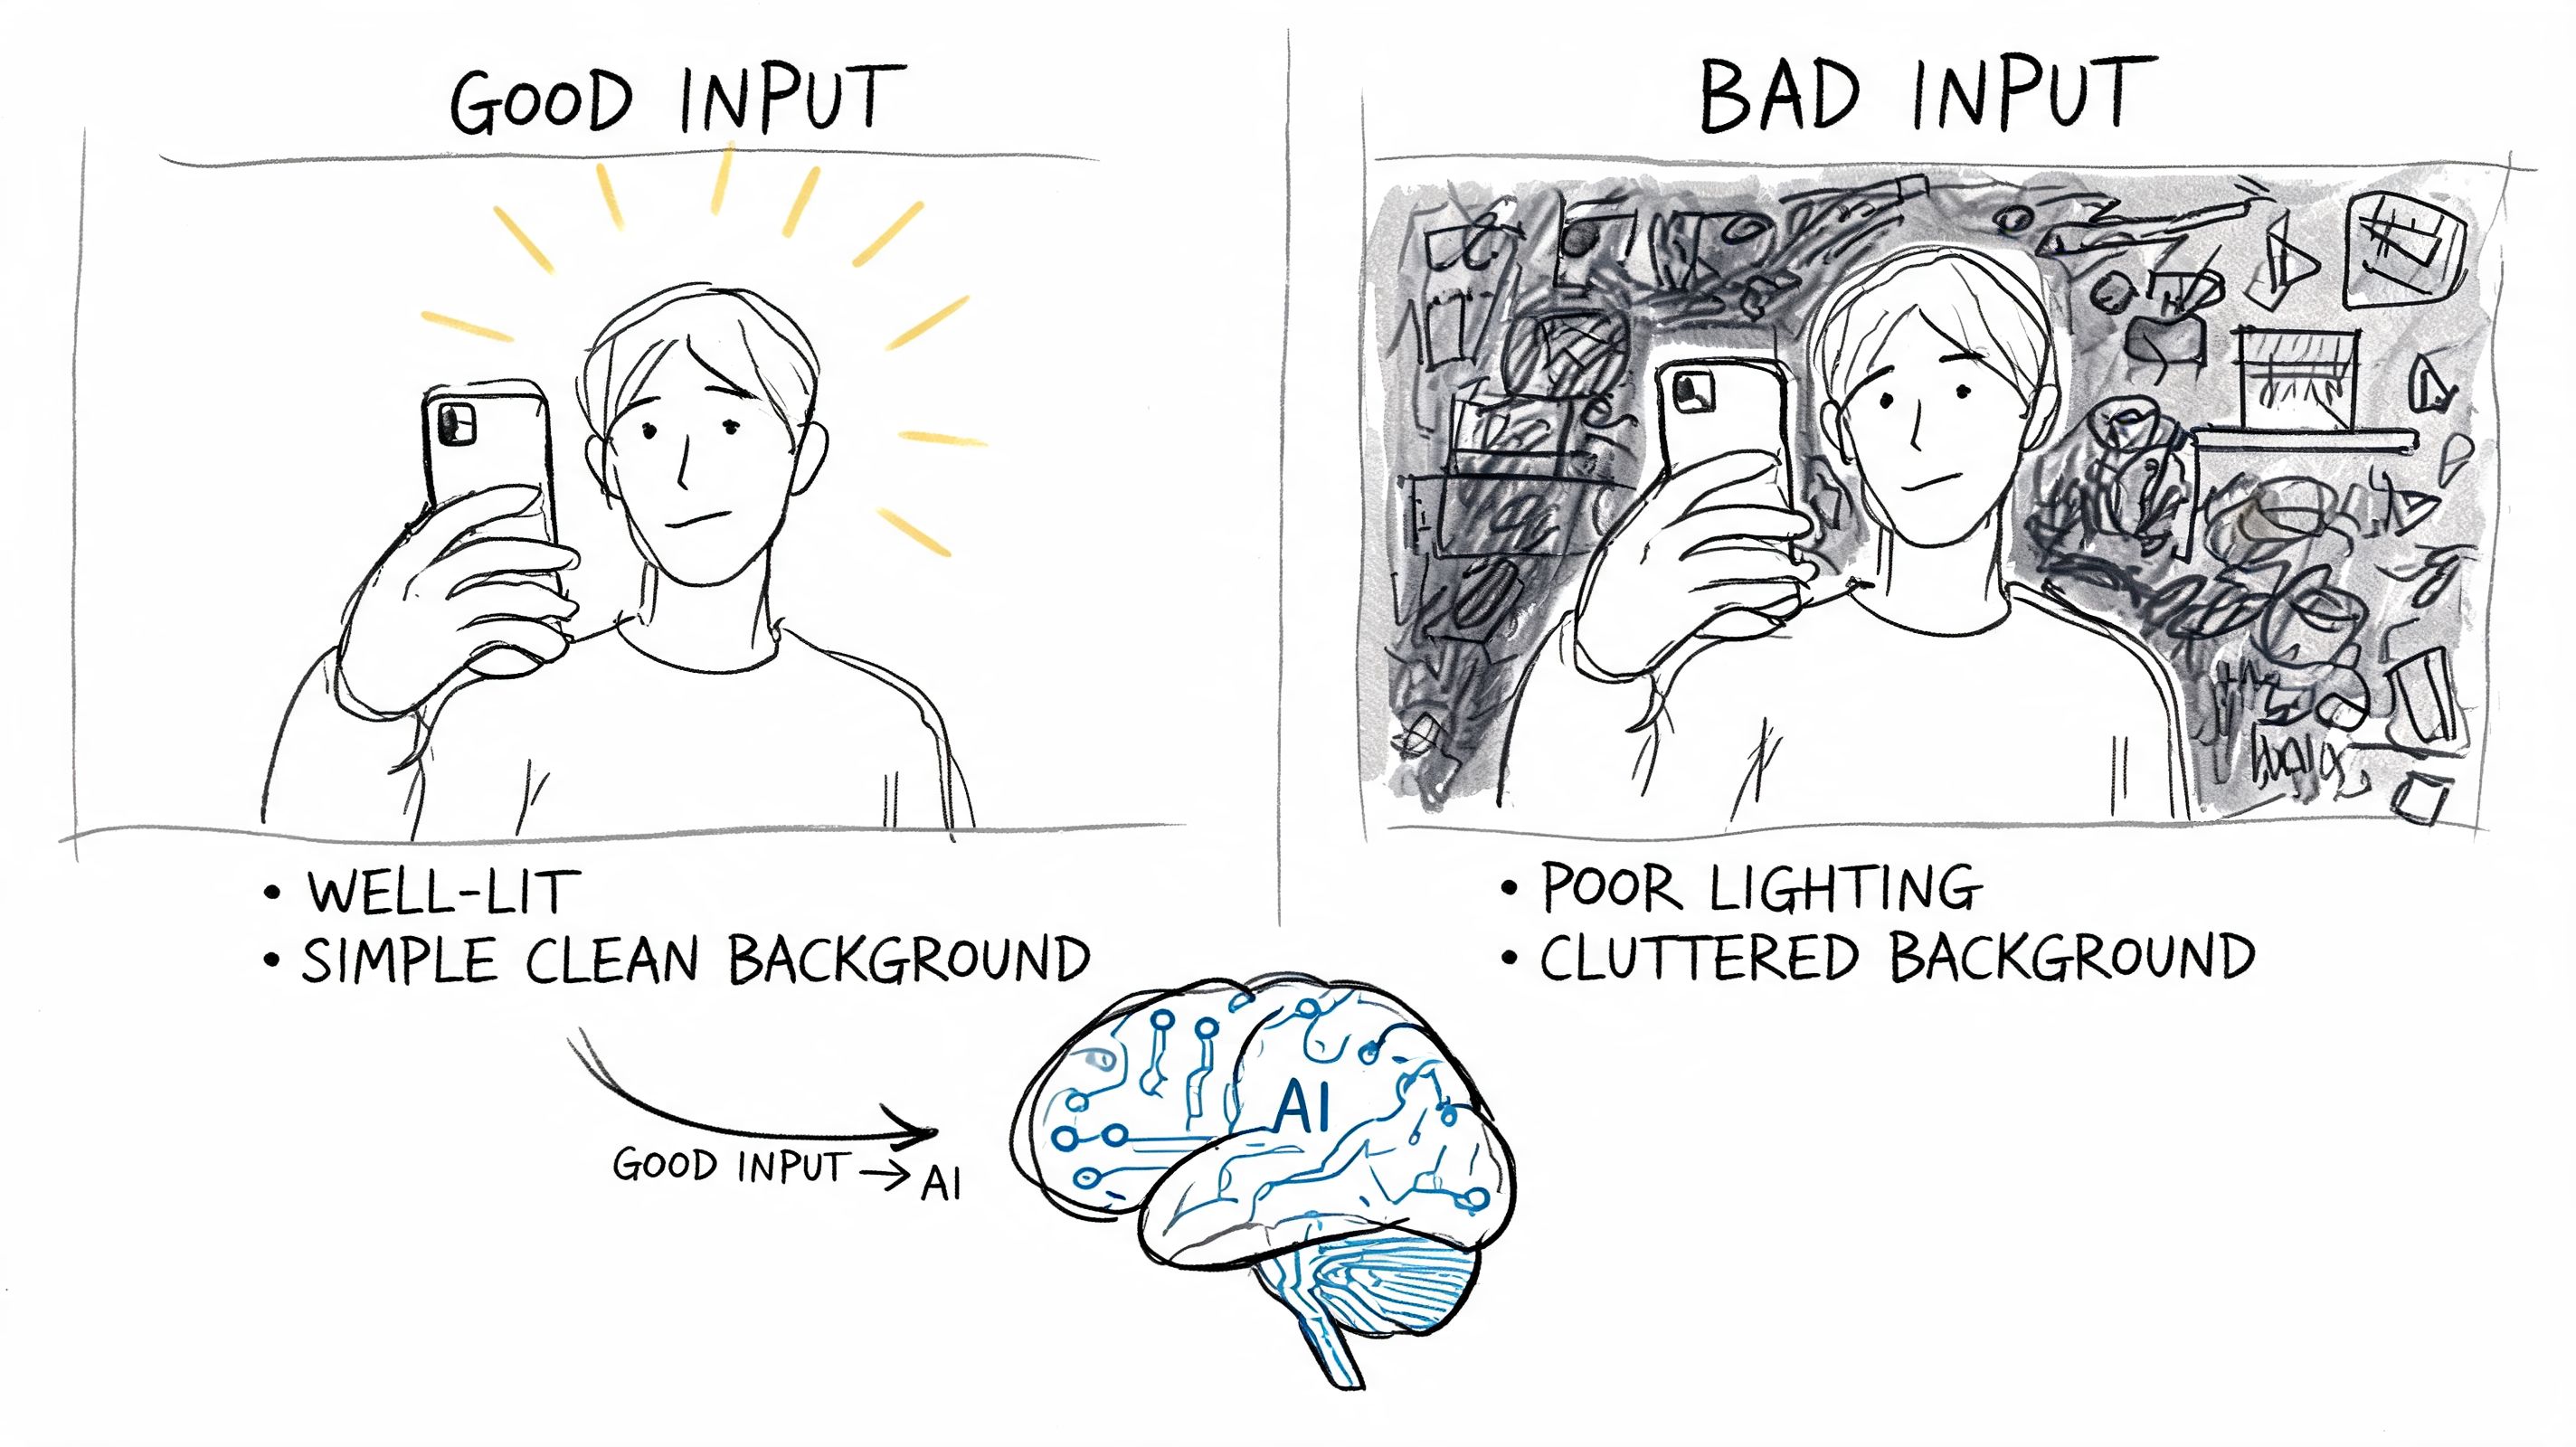
The fastest way to waste a generation is to upload weak inputs. If you want to create your own profile picture with AI, your source selfies need to be boring in the right way. Clean light, clean background, clean facial visibility.
That matters because you’re not just taking one nice selfie. You’re feeding a system examples of your face from which it will infer shape, skin tone, hair texture, and expression patterns. Better input gives the model fewer chances to guess.
People often turn to AI because a traditional shoot can be expensive and inconvenient. The cost barrier is real. Professional photography typically ranges from $150 to $500 per session, and that’s cited as a barrier for 68% of job seekers in this PicMonkey article on creating profile pictures. Using selfies as the starting point is practical. The key is making those selfies usable.
Get the light right first
If the light is wrong, everything downstream gets harder. The best setup for many is simple. Stand facing a window with soft daylight. Keep the window slightly off to one side if you want a little shape in the face, but not so far that one side falls into shadow.
Avoid overhead kitchen lights, mixed indoor lighting, and direct midday sun on your face. Those setups create harsh shadows under the eyes and nose. AI often exaggerates those shadows or smooths them in a way that looks synthetic.
A few practical rules work well:
- Use indirect daylight: Bright shade or window light is easier for both your phone camera and the AI to interpret.
- Turn off competing lights: Mixed color temperatures can make skin tone inconsistent across your selfie set.
- Keep your face evenly visible: If one side of your face disappears into darkness, the generator may invent detail.
If you mostly shoot on a phone, these tips to make iPhone pictures look professional help because the same basics apply before you ever upload to an AI tool.
Choose a background the AI won’t fight
People assume a scenic background looks better. Usually it doesn’t. Busy environments create edge problems around hair, shoulders, and glasses. They also distract you from the one thing that matters in a headshot: the face.
A plain wall is your friend. So is a simple office corner with visual depth and no clutter. Neutral backgrounds make your features easier to isolate and generate consistently.
A quick comparison:
| Setup | Usually works | Usually fails |
|---|---|---|
| Background | Plain wall, simple room, neutral texture | Crowded room, bookshelf chaos, street scenes |
| Depth | A little distance from wall | Pressed flat against background |
| Color | Muted tones | Bright competing colors |
Wear clothes that survive transformation
AI tools tend to handle clear, structured outfits better than fussy ones. Solid colors usually generate more cleanly than tiny patterns. Necklines matter too. What frames your face in the selfie tends to influence how polished the output feels.
Good choices include:
- Structured basics: Blazer, collared shirt, knit top, simple crew neck
- Stable colors: Navy, charcoal, black, cream, muted green, soft blue
- Minimal extras: Simple jewelry is fine. Reflective accessories often aren’t.
Skip logos, thin stripes, heavy prints, and anything semi-sheer. The more visual noise you introduce, the more opportunities the model has to distort fabric or invent odd details.
The best source set usually feels a little repetitive. That’s a feature, not a flaw. Consistency gives the model a stable read on your face.
Build a useful selfie set
Don’t upload near-duplicates only. You want consistency, but you also want a small range of angles and expressions. Take a batch where your face stays clearly visible while a few variables change.
Aim for a mix like this:
- Straight-on shots with relaxed posture
- Slight left and right turns rather than dramatic profiles
- A few expressions from neutral to friendly
- A few framing options from chest-up to tighter head-and-shoulders
Old photos are a common mistake. If your haircut, beard, weight, makeup style, or glasses changed, the final outputs can drift into an uncanny middle ground that looks like an outdated version of you.
Posing and Expression Tips for Natural Results
You can take a technically clean selfie set and still get stiff, slightly off headshots if your face and posture are doing two different things. AI reads patterns fast, but it does not read intention well. If your jaw is tense, your smile is polite-but-forced, or your pose changes wildly from shot to shot, the model often exaggerates those signals instead of smoothing them out.
The goal isn't to look photogenic, but to appear natural and intentional.
Small pose changes make a big difference
Start with your body, not your smile. A good base pose gives the model a cleaner read on your face and usually improves keeper rate more than trying ten different expressions. Stand or sit tall, drop the shoulders, and lengthen the back of the neck. Then bring the chin slightly forward and slightly down. That combination tends to define the jaw without creating that “trying to look sharp” tension.
Keep your body turned a little off-center. A fully square pose can work for formal bios, but it often feels flat in AI outputs because the generator has less shape to work with around the shoulders and neckline. A slight turn with eyes near the camera usually gives you a better starting frame.
Head angle matters too. Small changes are useful. Big ones create problems. If you shoot from high above, low below, or too far off to one side, the model may learn distortion instead of structure.
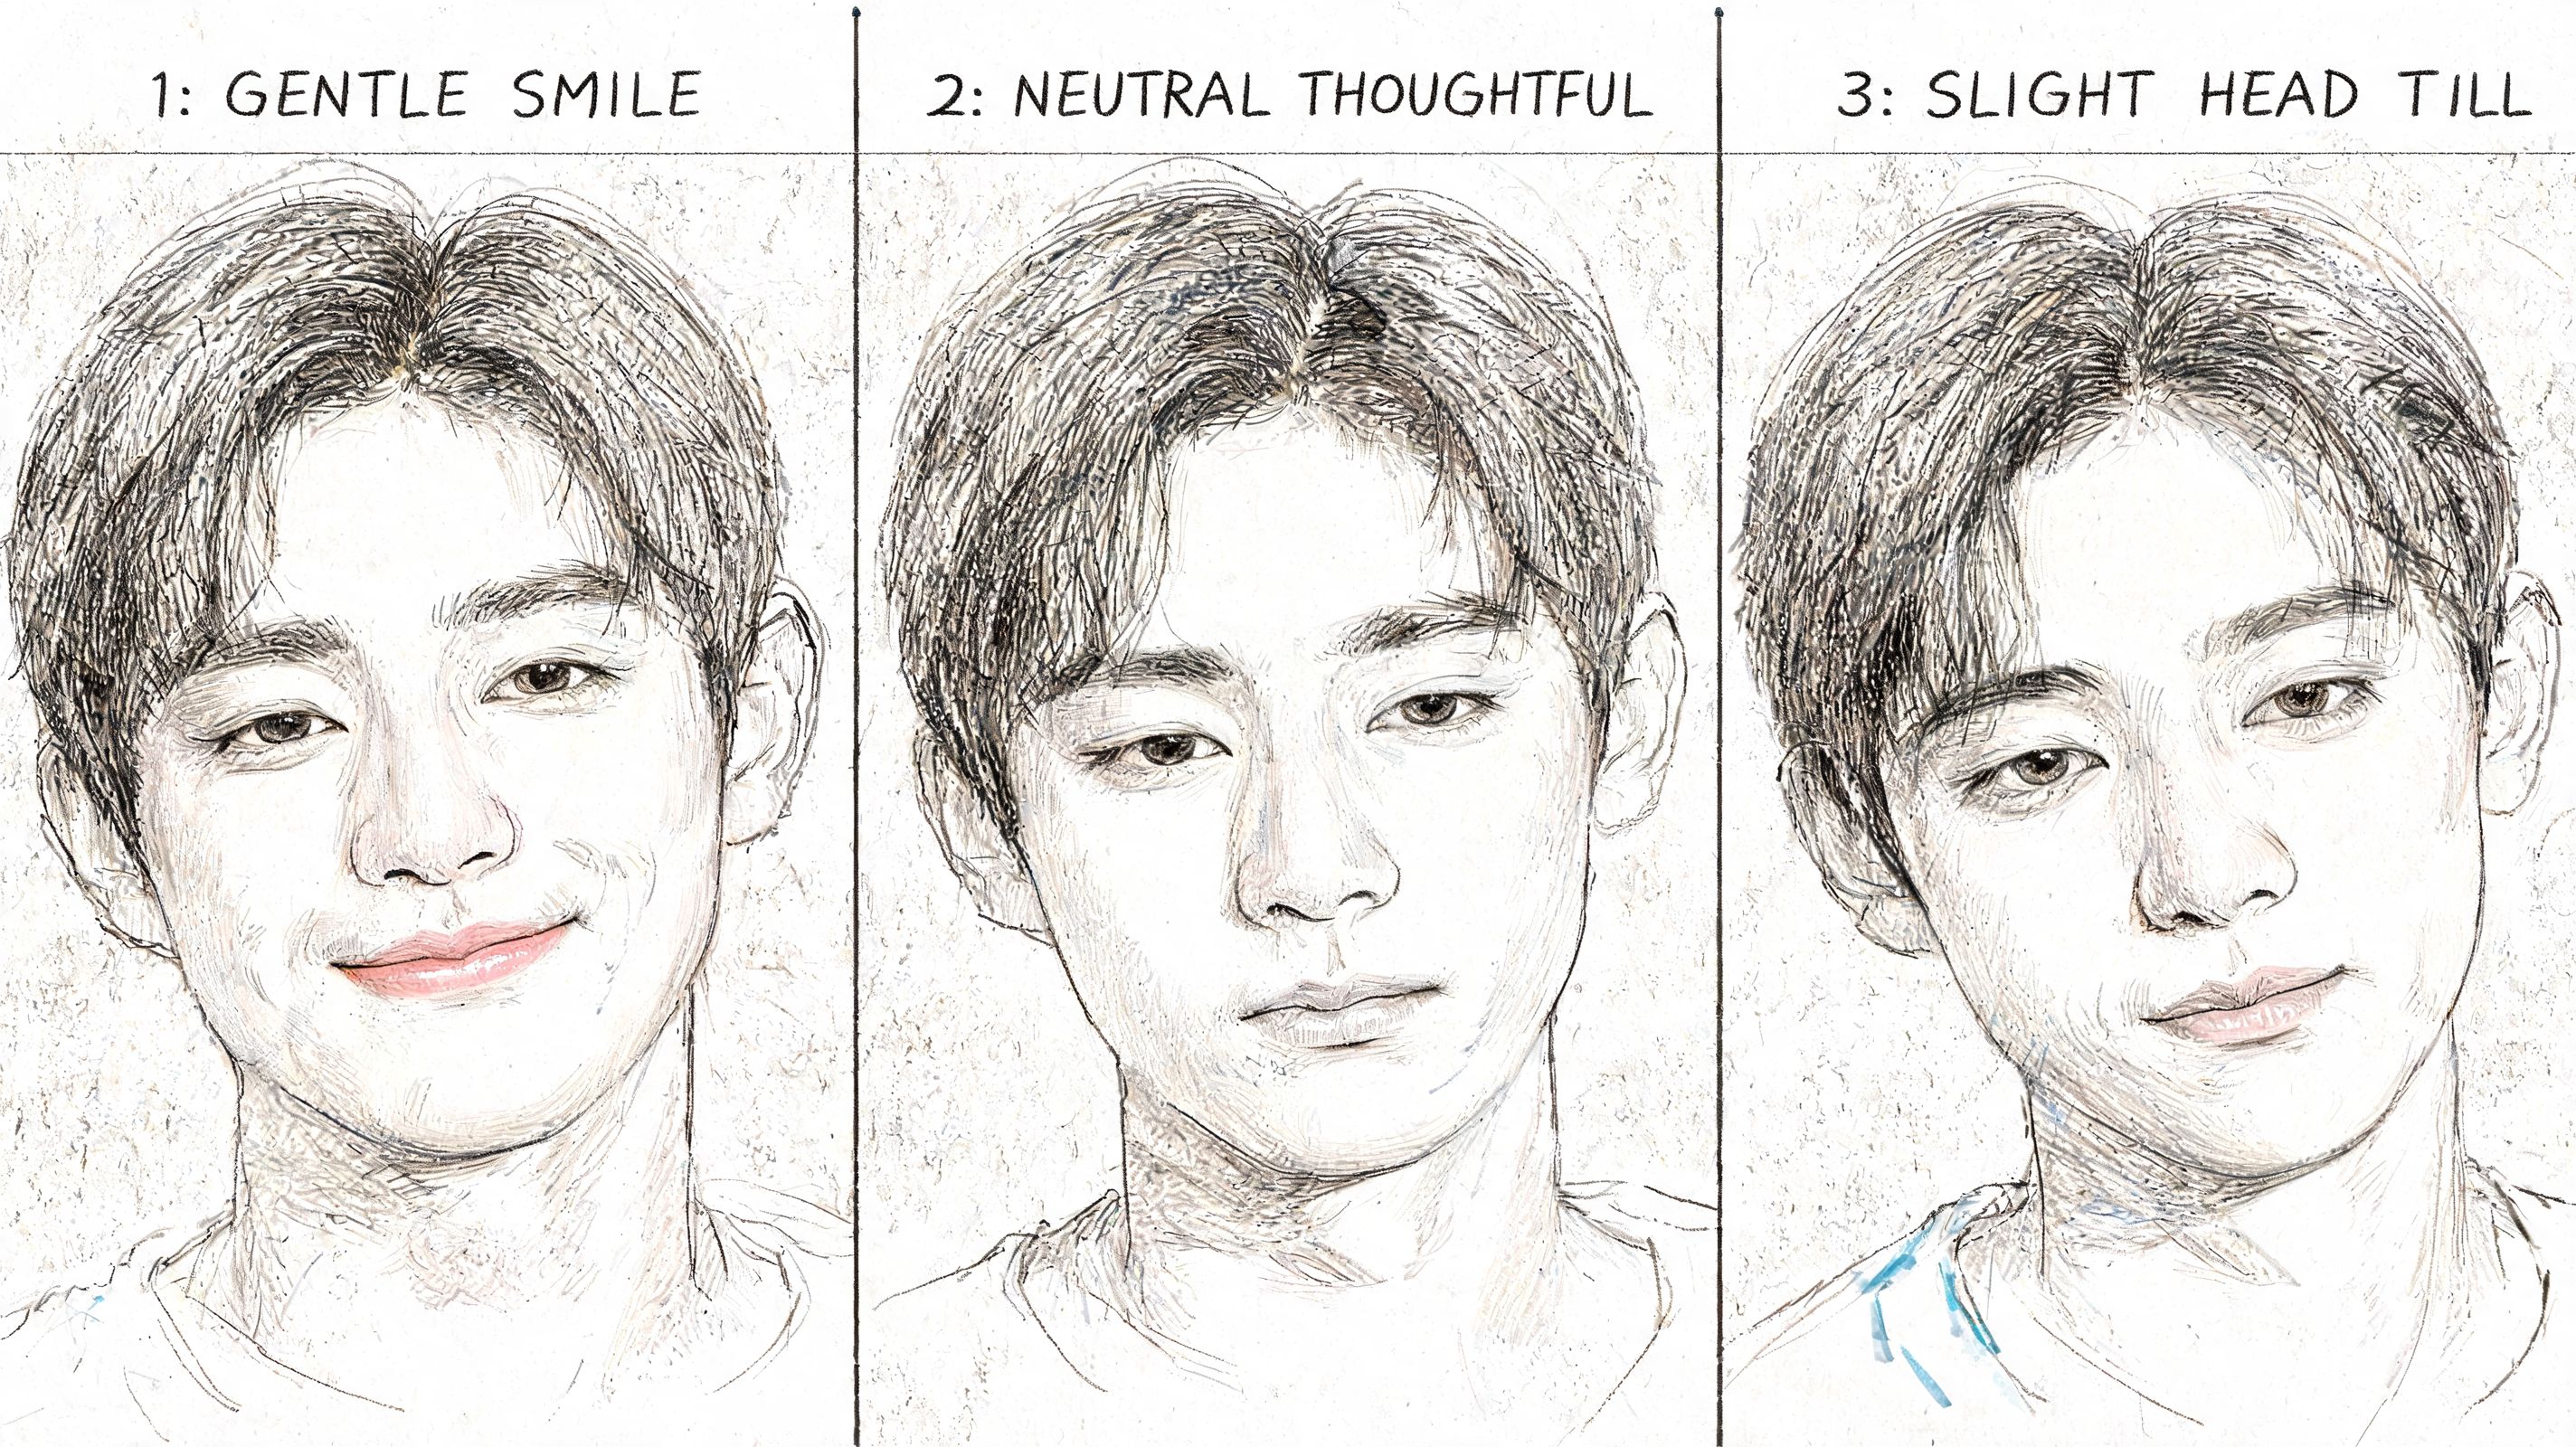
Use three expression modes
Treat expressions like inputs you are testing, not moods you are waiting to feel. I usually recommend taking a short set in three controlled modes so the generator sees a consistent version of you with a little range.
Gentle smile
This is the safest option for LinkedIn, team pages, client work, and anything that needs warmth without looking casual. Keep the mouth soft and let the eyes do some of the work. If the smile pulls wide but the eyes stay still, AI often turns it into a generic corporate grin.
Neutral thoughtful
This works well for consultants, founders, creatives, and speaker profiles. The trade-off is that neutral can look polished or slightly severe depending on tension around the mouth and brow. Keep the lips loose, breathe out before the shot, and avoid widening the eyes.
Slight head tilt
A small tilt can make serious faces feel more approachable and less rigid. Keep it subtle. Too much tilt can read uncertain, and some generators over-interpret it, especially if several uploads repeat the same angle.
If posture and facial tension tend to fight each other in your photos, this guide on how to look confident in photos gives a practical breakdown of what confidence looks like on camera.
A believable expression usually survives AI processing better than a polished one.
What to avoid because AI amplifies it
Some mistakes do more than lower quality. They teach the model the wrong version of your face.
- Sunglasses and face obstruction: Hidden eyes, brows, or hairline details force the model to guess, and guesses often show up as odd symmetry or fake skin texture.
- Other people in frame: Even tight crops from group photos can leave confusing shoulder shapes, hair edges, or lighting cues.
- Extreme angles: Car selfies, overhead shots, and dramatic profiles reduce consistency across the set.
- Beauty filters: Skin smoothing, face slimming, and reshaping filters strip out the facial data you want the generator to learn.
- Performance expressions: Big laughs, smirks, raised brows, and “serious face” looks are fun in a camera roll. They are weak training material.
One practical rule helps. If a selfie looks like your real face on a calm, well-rested day, keep it. If it looks like your phone is flattering you, your posture is compensating for nerves, or the angle is doing the work, leave it out.
The same principle shows up outside photography too. Good inputs produce better outputs whether you're building a headshot set or doing coding interview preparation with AI tools. Clean signal beats flashy signal.
Using an AI Generator to Create Your Headshots
The upload stage feels simple, but it is a point where a lot of people make strategic mistakes. They rush into style selection before they’ve decided what the photo needs to do. A good headshot for a law firm bio is not the same image you’d want for a startup founder page or a speaking profile.
Start by grouping your goal into one of three use cases: conservative professional, modern professional, or personal brand. That gives you a filter for every style choice that follows.
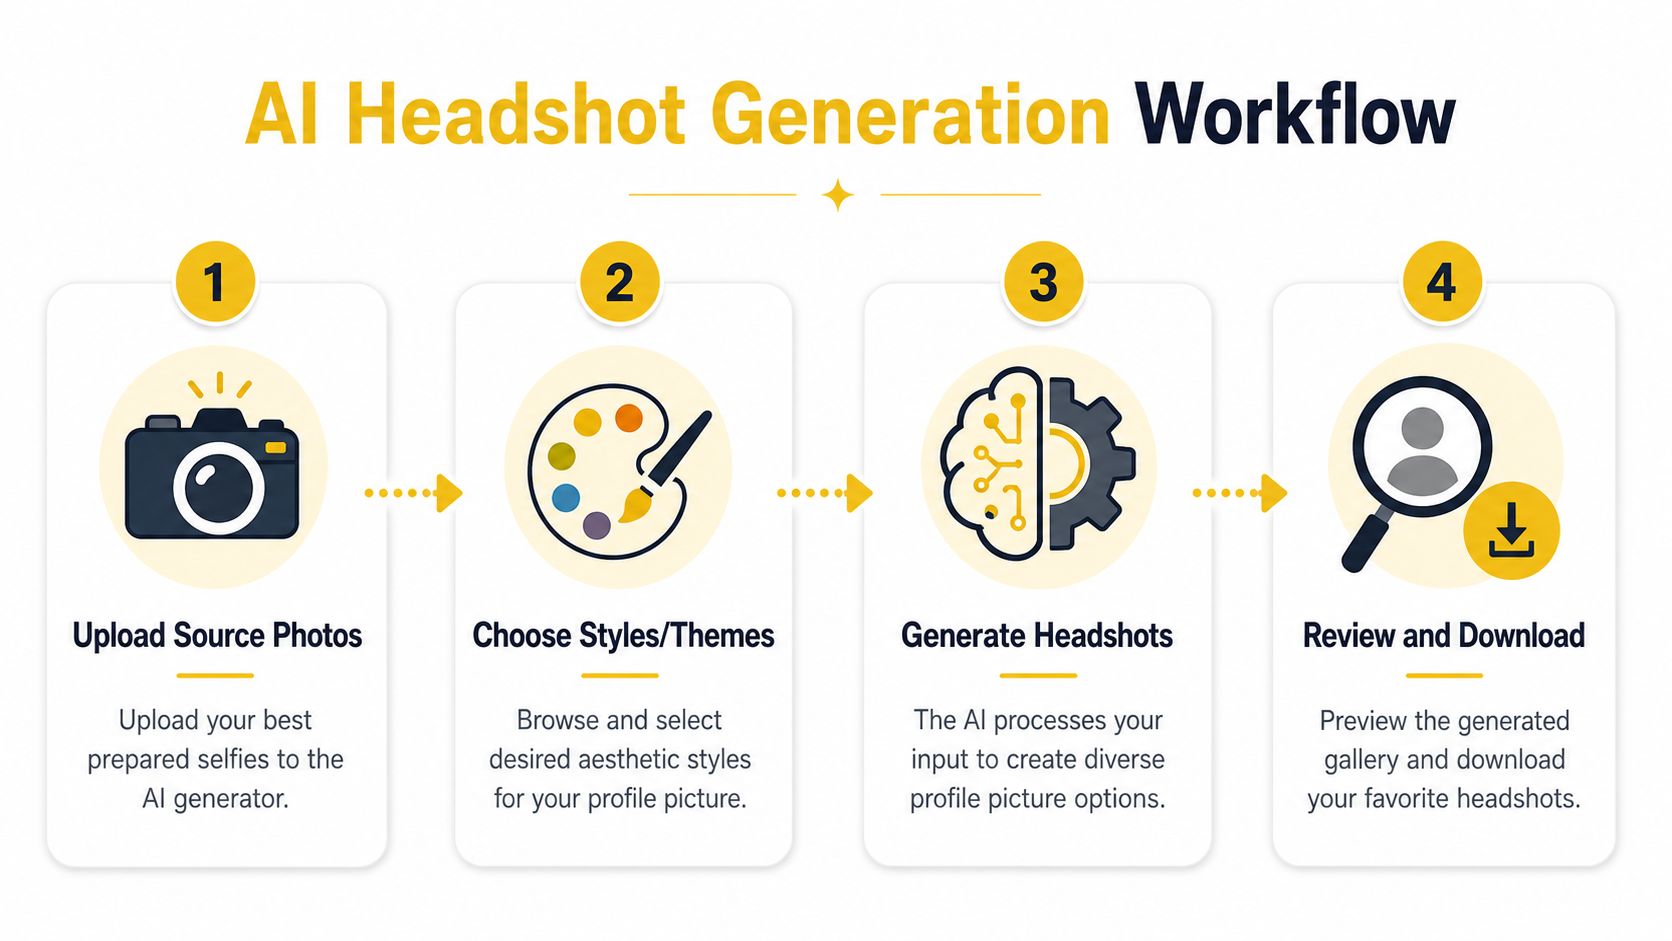
Upload less noise and more signal
Your first batch should include only the selfies that clearly represent your current look. Don’t throw in experiments, old cropped photos, or near-duplicates where the lighting changes wildly. You want the model to learn your face, not your indecision.
Once the selfies are in, most generators ask you to choose styles, backgrounds, or themes. However, an abundance of choice at this point can be detrimental. Many profile picture tools offer endless template libraries, but the actual user need is usually multiple consistent variations for different platforms. That’s the core point in Pixlr’s profile picture maker page: abundance doesn’t always help. Curated style packs and batch generation are often more practical because they preserve a coherent identity.
One option in this category is FaceJam’s AI headshot generator, which uses curated templates and style packs rather than asking users to sift through an endless wall of unrelated looks. That approach tends to make selection easier when you need several usable versions of the same person.
Match the style to the job, not your mood
People often choose styles they personally like instead of styles that fit where the image will live. That’s how you end up with a cinematic portrait for a corporate directory or a stiff boardroom look for a creative portfolio.
A practical way to choose:
| Use case | Style direction | Usually works |
|---|---|---|
| LinkedIn for broad job search | Clean corporate or modern professional | Neutral background, light smile, tidy wardrobe |
| Founder or startup page | Modern, minimal, slightly relaxed | Softer styling, approachable expression |
| Resume and directory | Conservative and consistent | Straightforward framing, simple attire |
| Creative profile | Editorial but credible | More personality, still face-first |
If you’re polishing your whole candidate package, not just the image, strong coding interview preparation can matter just as much as the headshot for technical roles. The photo gets attention. The interview gets the offer.
Later in the workflow, it helps to watch another creator’s process and compare it to your own decisions:
Review like an editor, not like a fan
The first generation batch usually produces a mix. A few images will feel immediately strong. Some will be close. Others will look polished at first glance and then fall apart once you inspect the eyes, teeth, hairline, collar, or hands.
People tend to get overwhelmed or too forgiving. Don’t pick your favorite because it feels impressive. Pick the image that still looks believable after a close look.
A strong review process usually looks like this:
- First pass: Remove anything that doesn’t look like you
- Second pass: Remove anything with expression, eye, or clothing weirdness
- Third pass: Keep only images that fit the exact platform and role
- Final pass: Choose one anchor image, then a few alternates with the same identity
If none of the results feel right, don’t force it. That usually points back to the source set or to a poor style match, not to some personal failing in front of the camera.
Finalizing and Cropping Your Picture for Any Platform
You generate a portrait that looks great in the gallery, upload it to LinkedIn, and suddenly the top of the hair is clipped, one shoulder disappears in the circle crop, and the face feels oddly crowded. That last 10 percent decides whether the image reads as polished or off.
Generation gives you options. Finalizing gives you a usable profile picture.
Before exporting anything, review the image at full size and at thumbnail size. AI mistakes often hide in one view and become obvious in the other. I usually judge finalists the same way they will be seen in real life: one close inspection at 100 percent, then one quick glance at small size beside a name.
Check for subtle AI artifacts
The obvious failures are easy to reject. The keeper-rate killers are the quiet ones. A portrait can feel strong overall and still lose trust because the pupils don’t align, the teeth look too perfect, or the jacket collar bends in a way real fabric never would.
Use this review list:
- Eyes first: Check gaze direction, eyelid shape, catchlights, and sharpness in both eyes.
- Mouth and teeth: Look for uneven lip edges, fused teeth, or texture that feels airbrushed.
- Hairline and ears: Zoom into the outline where hair meets skin and background.
- Clothing structure: Inspect collars, lapels, seams, jewelry, and glasses arms.
- Background transitions: Watch for halos, soft smears, or duplicated edges near the shoulders.
If your tool offers upscaling, save it for the two or three finalists. Upscaling a weak image only makes the flaws easier to see.
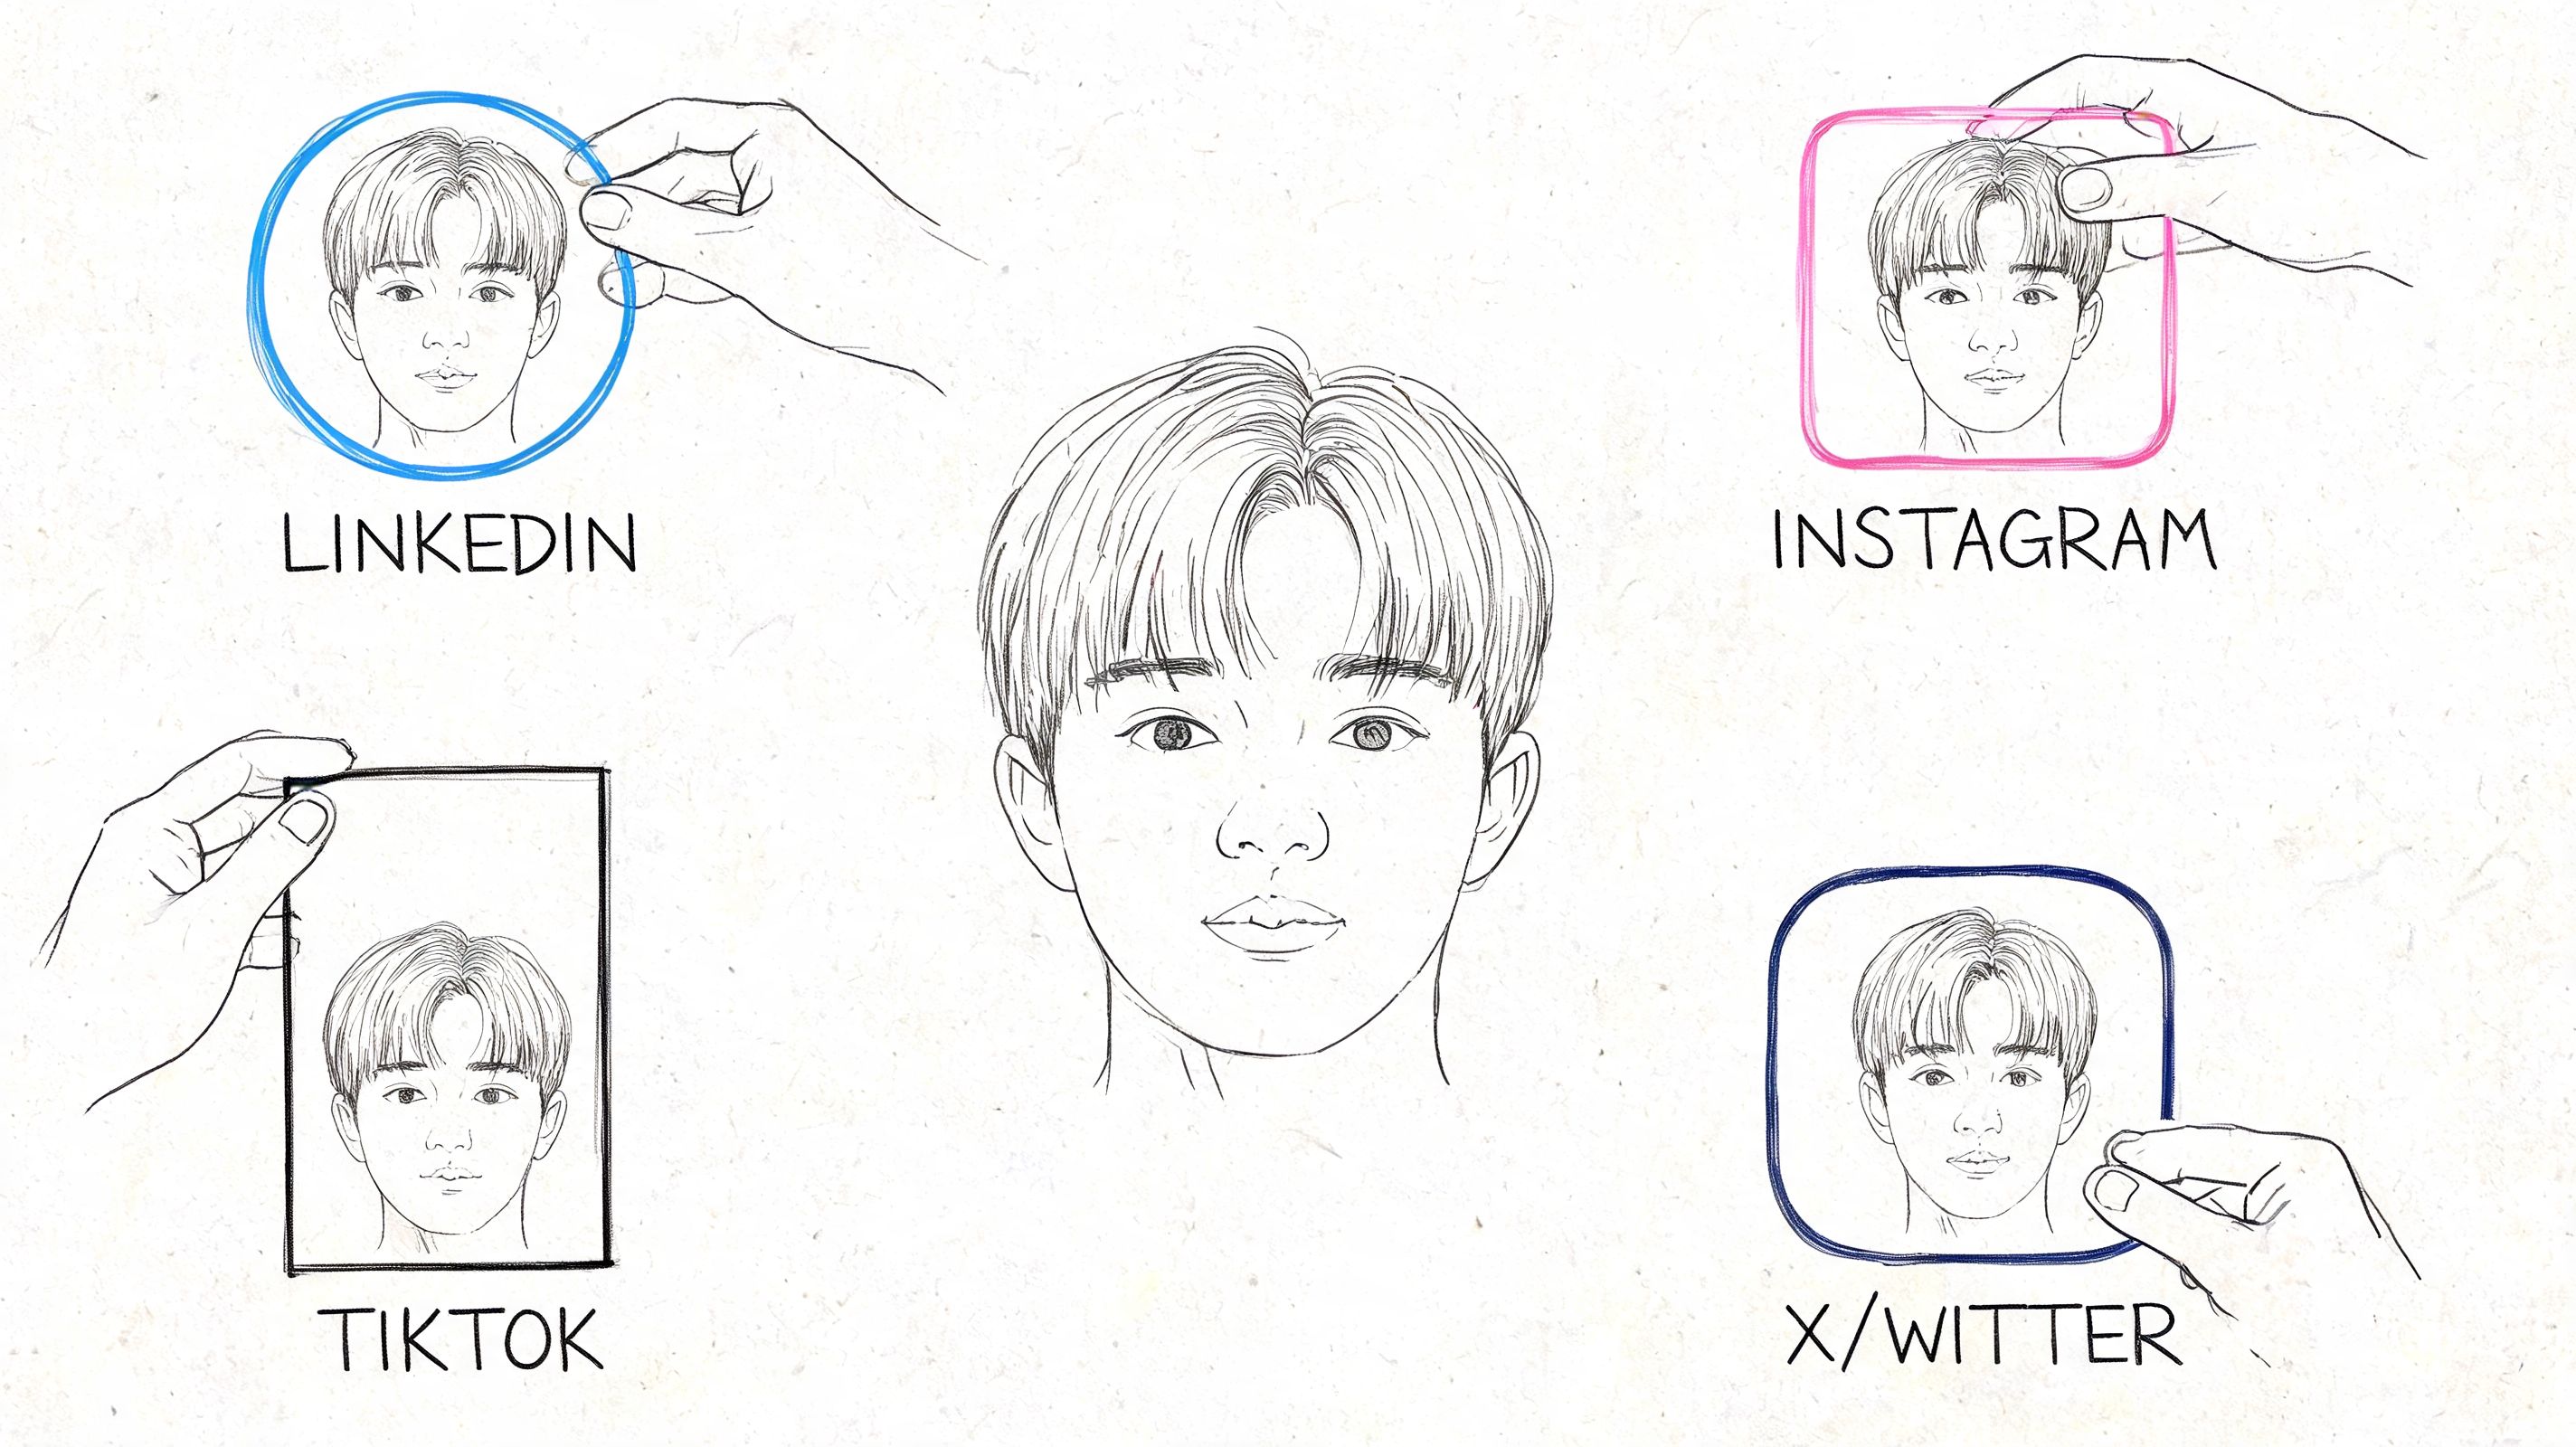
Crop for the platform, not for the original composition
This is the part many first-time users skip. The AI does not know whether the image will end up in a circle, a square, a tiny directory thumbnail, or a resume column. You have to make that decision.
A crop that looks balanced in a full-frame preview can fail fast on an actual platform. LinkedIn is the common problem. If the head sits a little too high or too far left, the circular mask makes the portrait feel cramped. Resume layouts usually want more breathing room. Team pages often look best when everyone is framed at roughly the same scale.
A practical cropping guide:
Use a head-and-shoulders crop with extra space above the hairline and enough room on both sides of the face. Test it inside a circle before you export the final version.
Resume
A square or slight vertical crop usually holds up better. Leave more chest and shoulder visible so the image feels anchored beside text rather than floating.
Corporate directory
Match the system, not your personal favorite. If the rest of the team uses neutral backgrounds, shallow smiles, and mid-chest crops, follow that pattern.
Other social profiles
Adjust each version manually. Auto-cropping often cuts into hair, pushes the face off-center, or turns a solid portrait into an awkward thumbnail.
If you are deciding between two finalists, get outside feedback before locking one in. Tools like PhotoFeeler can be useful for comparing perceived professionalism and approachability, and PeopleFinder's AI detection tips are also helpful for catching the synthetic details that slip past you after staring at the same image too long.
The best profile picture is the one that still looks like you after resizing, cropping, and compressing it for the platform where people will actually see it.
Checklist and Troubleshooting for Best Results
Most weak results come from a short list of avoidable problems. If you treat this like a production workflow instead of a one-click magic trick, your keeper rate usually improves fast.
Quick checklist before you generate
- Use recent selfies: Your current haircut, facial hair, glasses, and style should match real life.
- Shoot in soft light: Window light beats overhead lighting and harsh sun.
- Keep backgrounds simple: Plain walls outperform busy environments.
- Wear clean, structured clothing: Solid colors and simple necklines generate more reliably.
- Give the AI variety: Include a few angles and expressions, not one repetitive pose.
- Choose styles by use case: Pick for LinkedIn, resumes, or company pages, not just personal taste.
- Inspect full-size results: Thumbnails hide artifacts.
If the pictures look weird
If the output doesn’t look like you, start with the input set. Bad lighting, outdated photos, beauty filters, and inconsistent angles are the usual cause. The fix is often to reshoot, not to keep regenerating.
If the images look polished but obviously AI-made, inspect the details that people use to spot synthetic images. These PeopleFinder AI detection tips are useful for training your own eye before you choose a final portrait.
If you dislike every style, narrow your brief. “Professional” is too broad. “Approachable startup founder,” “traditional corporate,” or “clean recruiter-friendly LinkedIn photo” gives you something you can judge against.
If you’re wondering about usage rights, check the platform’s terms before you upload. For business use, you want clear ownership and permission to use the images on LinkedIn, resumes, websites, and company materials.
If you want a simple way to turn well-shot selfies into polished headshots, FaceJam lets you upload your own photos, choose from curated styles, and generate professional profile pictures for LinkedIn, resumes, and team pages without booking a traditional shoot.


